Angular internationalization (i18n) tutorial

In today's digital world, internationalization (i18n) is a crucial aspect of developing sophisticated web applications that can reach a global audience. Angular stands out in this domain, not only as a comprehensive framework widely utilized for web application development but also for its solid support for internationalization. This blog post will focus on explaining the process of internationalizing a web application using the Angular framework. We will specifically walk you through the steps of using the @angular/localize package. This is the official and most popular method introduced in Angular 9 for making your Angular application globally accessible. Moreover, we will delve into a comprehensive process encompassing content preparation for localization, its extraction, translation, and ultimately, its seamless reintegration into your app. So let's begin this journey.
All code samples used in this post are available on the GitHub repo.
Create a new Angular project
Let's begin by creating a new Angular project using Angular CLI.
Install Angular CLI globally:
npm install -g @angular/cli@17.0.1
Create a new Angular project:
ng new angular-i18n-example
Note: This tutorial is based on the latest Angular version available, 17.0.4, as of the time of writing. To follow along without any hitches, it's best to use the same version.
Add the localize package
To use Angular's localization features, you will need to add the @angular/localize package to your project. For that, let's open the terminal in the root of the project and run the following command:
ng add @angular/localize
This command will add @angular/localize as a development dependency and update several other files in the project.
Adjust the content for localization
To localize content, we first need to add some. For that purpose, we are going to update the app component files.
The app.component.html file:
<div>
  <p i18n="Simple message example@@message.simple">A simple message.</p>

  <p i18n="Argument message example@@message.argument">Hi, {{ name }}! 👋</p>

  <p i18n="Plural message example@@message.plural">{count, plural, one {{{count}} item} other {{{count}} items}}</p>

  <p i18n="Gender message example@@message.gender">{gender, select, male {Mr {{ name }}} female {Mrs {{ name }}} other {Client {{ name }}}}</p>

  <p i18n="Formatted number message example@@message.number-format">Formatted number: {{ amount | number: ".2" }}</p>

  <p i18n="Formatted date message example@@message.date-format">Formatted date: {{ currentDate | date: "fullDate" }}</p>

  <div>
    <ng-container>{{ footerMessage }}</ng-container>
  </div>
</div>
By adding i18n attributes to the component template above, we mark the content for localization. i18n is a custom attribute recognized by Angular. Its value is optional and, if provided, should follow the order: meaning|description@@id. Each of these value parts is optional.
A concise overview of each part:
meaning– Indicates the meaning or intent of a text message in a specific application context, providing essential guidance to translators for consistent and accurate interpretation of messages.description– Provides additional information for translators to ensure a more accurate translation.|– Acts as the separator, distinguishing meaning from description in the text.@@id– Denotes the user-defined ID of the message.
Note: The posted example contains messages using the ICU Plural and ICU Select message syntax. If you are unfamiliar with ICU syntax, please refer to the dedicated post about ICU syntax for more details.
To display the above-defined template successfully, you will need to update the app.component.ts file as well. This file not only contains required data, but also showcases an example of localization in the component (see footerMessage). The direct utilization of the $localize function makes this localization possible. To incorporate optional parameters such as meaning, description, and @@id (as used in the template file), prepend them to the text message, wrapped with colons.
The app.component.ts file:
import { Component } from '@angular/core';
import { CommonModule } from '@angular/common';
import { RouterOutlet } from '@angular/router';

@Component({
  selector: 'app-root',
  standalone: true,
  imports: [CommonModule, RouterOutlet],
  templateUrl: './app.component.html',
  styleUrl: './app.component.css',
})
export class AppComponent {
  name: string = 'John';
  count: number = 5;
  gender: string = 'male';
  amount: number = 7.5;
  currentDate: number = Date.now();

  company: string = 'Localizely';
  footerMessage: string = $localize`:Component argument message example@@message.component-argument:Made with ❤️ by ${this.company}`;
}
Localizing content within the ng-container
The <ng-container> elements can also incorporate an i18n attribute. This enables seamless localization without the need to introduce additional DOM elements into the application.
<ng-container i18n>Your message</ng-container>
Localizing the value of element attribute
To localize values of element attributes, you can use i18n-<attribute> attributes. Here, <attribute> should correspond to the name of the attribute you want to localize. For example, i18n-title for the title attribute. These attributes accept the same optional value as the i18n attribute.
<p title="Your title" i18n-title>Your message</p>
Locale specific formatting with pipes
Pipes are simple functions designed to transform data from one form to another. In the context of software localization, they facilitate the usage of properly formatted data, ensuring alignment with the currently active locale on the page. Below are some of the most common use cases.
Format a date value using DatePipe:
{{ today | date }}
Example for American English: Nov 21, 2023
Example for French: 21 nov. 2023
Format a number into a currency string using CurrencyPipe:
{{ amount | currency }}
Example for American English: $123,456.00
Example for French: 123 456,00 $US
Format a number into a decimal number string using DecimalPipe:
{{ count | number }}
Example for American English: 123,456.78
Example for French: 123 456,78
Format a number into a percentage string using PercentPipe:
{{ value | percent }}
Example for American English: 76%
Example for French: 76 %
Custom message IDs
While message IDs are auto-generated during the extraction phase, there are situations where using custom or user-defined message IDs offers distinct benefits. Here, we delve into the advantages and drawbacks of opting for custom message IDs.
Pros:
- User-defined message IDs often carry inherent meaning and context, offering a stark contrast to their automatically generated counterparts. For example,
page.home.titleis more intuitive than a string likeba0cc104d3d69b.... - User-defined message IDs streamline the search and filtering process in translation tools, offering a clear advantage over automatically generated ones. For example, knowing a message's placement on the Home page allows for an efficient search using
page.home. - Altering the text of a source message doesn't necessitate the generation of a new message ID. This feature is particularly useful when using translation tools, as it prevents the accumulation of obsolete messages in your database.
Cons:
- A significant downside is the requirement to manually manage all message IDs, which can be labor-intensive.
- Employing the same message ID for distinct messages in different contexts can lead to confusion and errors, such as one message unintentionally overriding another. For instance, using
common.backfor both 'Back' and 'Go back' could lead to one of these messages being inadvertently overwritten.
Extract marked content for localization
To extract previously marked content, run the following CLI command from the project root:
ng extract-i18n --output-path src/locale
Note that it is good practice to keep all localization files in one place. For that purpose, we use the --output-path command option. If everything went well, you should find the messages.xlf file in the src/locale directory. This file serves as the source language file, which will be used as a basis for creating other XLIFF (XML Localization Interchange File Format) files.
Also, extract-i18n supports extraction in different file formats. In this tutorial, we use the default format, the xlf. You can find more information regarding extract-i18n on its doc page.
Note: By default, Angular uses American English (en-US) as the source locale. To change this, you will need to update the project configuration (i18n option within the angular.json file).
Translate XLIFF files
Now that we have successfully extracted the source localization messages, we need to translate them into other languages for our app. In our case, this means French. To do this, we'll copy the messages.xlf file and rename it to messages.fr.xlf. This new file will contain the French translations. The procedure for adding any new language in the future will be the same. Additionally, keeping the locale code in the file name is a good practice. This approach simplifies project navigation and the implementation of future changes.
The messages.xlf file:
<?xml version="1.0" encoding="UTF-8" ?>
<xliff version="1.2" xmlns="urn:oasis:names:tc:xliff:document:1.2">
<file source-language="en-US" datatype="plaintext" original="ng2.template">
<body>
<trans-unit id="message.simple" datatype="html">
<source>A simple message.</source>
<context-group purpose="location">
<context context-type="sourcefile">src/app/app.component.html</context>
<context context-type="linenumber">2,4</context>
</context-group>
<note priority="1" from="description">Simple message example</note>
</trans-unit>
<trans-unit id="message.argument" datatype="html">
<source>Hi, <x id="INTERPOLATION" equiv-text="{{ name }}"/>! 👋</source>
<context-group purpose="location">
<context context-type="sourcefile">src/app/app.component.html</context>
<context context-type="linenumber">4,6</context>
</context-group>
<note priority="1" from="description">Argument message example</note>
</trans-unit>
<trans-unit id="message.plural" datatype="html">
<source>{VAR_PLURAL, plural, one {<x id="INTERPOLATION"/> item} other {<x id="INTERPOLATION"/> items}}</source>
<context-group purpose="location">
<context context-type="sourcefile">src/app/app.component.html</context>
<context context-type="linenumber">6,8</context>
</context-group>
<note priority="1" from="description">Plural message example</note>
</trans-unit>
<trans-unit id="message.gender" datatype="html">
<source>{VAR_SELECT, select, male {Mr <x id="INTERPOLATION"/>} female {Mrs <x id="INTERPOLATION"/>} other {Client <x id="INTERPOLATION"/>}}</source>
<context-group purpose="location">
<context context-type="sourcefile">src/app/app.component.html</context>
<context context-type="linenumber">8,10</context>
</context-group>
<note priority="1" from="description">Gender message example</note>
</trans-unit>
<trans-unit id="message.number-format" datatype="html">
<source>Formatted number: <x id="INTERPOLATION" equiv-text="{{ amount | number : ".2" }}"/></source>
<context-group purpose="location">
<context context-type="sourcefile">src/app/app.component.html</context>
<context context-type="linenumber">10,12</context>
</context-group>
<note priority="1" from="description">Formatted number message example</note>
</trans-unit>
<trans-unit id="message.date-format" datatype="html">
<source>Formatted date: <x id="INTERPOLATION" equiv-text="{{ currentDate | date : "fullDate" }}"/></source>
<context-group purpose="location">
<context context-type="sourcefile">src/app/app.component.html</context>
<context context-type="linenumber">12,15</context>
</context-group>
<note priority="1" from="description">Formatted date message example</note>
</trans-unit>
<trans-unit id="message.component-argument" datatype="html">
<source>Made with ❤️ by <x id="PH" equiv-text="this.company"/></source>
<context-group purpose="location">
<context context-type="sourcefile">src/app/app.component.ts</context>
<context context-type="linenumber">20</context>
</context-group>
<note priority="1" from="description">Component argument message example</note>
</trans-unit>
</body>
</file>
</xliff>
Below, you can find the updated content of the messages.fr.xlf file. We've updated the file element with the target-language attribute, and extended each trans-unit element with the target element (translation).
The messages.fr.xlf file:
<?xml version="1.0" encoding="UTF-8" ?>
<xliff version="1.2" xmlns="urn:oasis:names:tc:xliff:document:1.2">
<file source-language="en-US" target-language="fr" datatype="plaintext" original="ng2.template">
<body>
<trans-unit id="message.simple" datatype="html">
<source>A simple message.</source>
<target>Un message simple.</target>
<context-group purpose="location">
<context context-type="sourcefile">src/app/app.component.html</context>
<context context-type="linenumber">2,4</context>
</context-group>
<note priority="1" from="description">Simple message example</note>
</trans-unit>
<trans-unit id="message.argument" datatype="html">
<source>Hi, <x id="INTERPOLATION" equiv-text="{{ name }}"/>! 👋</source>
<target>Salut, <x id="INTERPOLATION" equiv-text="{{ name }}"/>! 👋</target>
<context-group purpose="location">
<context context-type="sourcefile">src/app/app.component.html</context>
<context context-type="linenumber">4,6</context>
</context-group>
<note priority="1" from="description">Argument message example</note>
</trans-unit>
<trans-unit id="message.plural" datatype="html">
<source>{VAR_PLURAL, plural, one {<x id="INTERPOLATION"/> item} other {<x id="INTERPOLATION"/> items}}</source>
<target>{VAR_PLURAL, plural, one {<x id="INTERPOLATION"/> article} other {<x id="INTERPOLATION"/> articles}}</target>
<context-group purpose="location">
<context context-type="sourcefile">src/app/app.component.html</context>
<context context-type="linenumber">6,8</context>
</context-group>
<note priority="1" from="description">Plural message example</note>
</trans-unit>
<trans-unit id="message.gender" datatype="html">
<source>{VAR_SELECT, select, male {Mr <x id="INTERPOLATION"/>} female {Mrs <x id="INTERPOLATION"/>} other {Client <x id="INTERPOLATION"/>}}</source>
<target>{VAR_SELECT, select, male {Monsieur <x id="INTERPOLATION"/>} female {Mme <x id="INTERPOLATION"/>} other {Cliente <x id="INTERPOLATION"/>}}</target>
<context-group purpose="location">
<context context-type="sourcefile">src/app/app.component.html</context>
<context context-type="linenumber">8,10</context>
</context-group>
<note priority="1" from="description">Gender message example</note>
</trans-unit>
<trans-unit id="message.number-format" datatype="html">
<source>Formatted number: <x id="INTERPOLATION" equiv-text="{{ amount | number : ".2" }}"/></source>
<target>Numéro formaté: <x id="INTERPOLATION" equiv-text="{{ amount | number : ".2" }}"/></target>
<context-group purpose="location">
<context context-type="sourcefile">src/app/app.component.html</context>
<context context-type="linenumber">10,12</context>
</context-group>
<note priority="1" from="description">Formatted number message example</note>
</trans-unit>
<trans-unit id="message.date-format" datatype="html">
<source>Formatted date: <x id="INTERPOLATION" equiv-text="{{ currentDate | date : "fullDate" }}"/></source>
<target>Date formatée: <x id="INTERPOLATION" equiv-text="{{ currentDate | date : "fullDate" }}"/></target>
<context-group purpose="location">
<context context-type="sourcefile">src/app/app.component.html</context>
<context context-type="linenumber">12,15</context>
</context-group>
<note priority="1" from="description">Formatted date message example</note>
</trans-unit>
<trans-unit id="message.component-argument" datatype="html">
<source>Made with ❤️ by <x id="PH" equiv-text="this.company"/></source>
<target>Fabriqué avec ❤️ par <x id="PH" equiv-text="this.company"/></target>
<context-group purpose="location">
<context context-type="sourcefile">src/app/app.component.ts</context>
<context context-type="linenumber">20</context>
</context-group>
<note priority="1" from="description">Component argument message example</note>
</trans-unit>
</body>
</file>
</xliff>
Merge translations into the app
Once we’ve translated all localization messages, we should merge everything back into the app. In this example, we use an ahead-of-time (AOT) compilation that converts Angular HTML and TypeScript code into efficient JavaScript code. As of Angular 9, AOT is the default option for both development and production builds. To build a separate distributable copy of the app for each locale, we need to update the project configuration accordingly.
By setting the i18n project option, we define the locales of the project. In other words, we specify the source code's locale (sourceLocale) and the additional locales created by translating the initial XLIFF file (locales). The rest of the configuration pertains to the build and serve phases, which will help run the localized app.
The angular.json file:
{
  ...
  "projects": {
    "angular-i18n-example": {
      ...
      "i18n": {
        "sourceLocale": "en-US",
        "locales": {
          "fr": {
            "translation": "src/locale/messages.fr.xlf"
          }
        }
      },
      "architect": {
        "build": {
          ...
          "options": {
            ...
            "localize": true
          },
          "configurations": {
            ...
            "en-US": {
              "localize": ["en-US"]
            },
            "fr": {
              "localize": ["fr"]
            }
          },
          ...
        },
        "serve": {
          ...
          "configurations": {
            ...
            "en-US": {
              "buildTarget": "angular-i18n-example:build:development,en-US"
            },
            "fr": {
              "buildTarget": "angular-i18n-example:build:development,fr"
            }
          },
          ...
        },
        ...
      }
      ...
    }
    ...
  }
  ...
}
Due to deployment complexity and the goal of reducing rebuild time, the development server permits only one locale to run at a time. To use the project in development mode, replace <LOCALE> with either en-US or fr.
ng serve --configuration=<LOCALE> --open
Add language switcher
Language selection in web applications can be managed through several methods. One approach is configuring the server to automatically redirect HTTP requests based on the Accept-Language HTTP header's value. Alternatively, the server can present the app in the default language initially, allowing users to select their preferred language. A hybrid approach combines elements of both automatic and user-driven language selection.
Below is a straightforward example demonstrating how users can switch languages after the app's initial load.
The app.component.html file:
<div>
  <div class="lang-picker">
    <div *ngFor="let locale of locales">
      <a href="/{{ locale.localeCode }}/">
        {{ locale.label }}
      </a>
    </div>
  </div>

  <p i18n="Simple message example@@message.simple">A simple message.</p>

  <p i18n="Argument message example@@message.argument">Hi, {{ name }}! 👋</p>

  <p i18n="Plural message example@@message.plural">{count, plural, one {{{count}} item} other {{{count}} items}}</p>

  <p i18n="Gender message example@@message.gender">{gender, select, male {Mr {{ name }}} female {Mrs {{ name }}} other {Client {{ name }}}}</p>

  <p i18n="Formatted number message example@@message.number-format">Formatted number: {{ amount | number : ".2" }}</p>

  <p i18n="Formatted date message example@@message.date-format">Formatted date: {{ currentDate | date : "fullDate" }}</p>

  <div>
    <ng-container>{{ footerMessage }}</ng-container>
  </div>
</div>
The app.component.ts file:
import { Component } from '@angular/core';
import { CommonModule } from '@angular/common';
import { RouterOutlet } from '@angular/router';

interface Locale {
  localeCode: string;
  label: string;
}

@Component({
  selector: 'app-root',
  standalone: true,
  imports: [CommonModule, RouterOutlet],
  templateUrl: './app.component.html',
  styleUrl: './app.component.css',
})
export class AppComponent {
  locales: Locale[] = [
    { localeCode: 'en-US', label: 'English' },
    { localeCode: 'fr', label: 'Français' },
  ];

  name: string = 'John';
  count: number = 5;
  gender: string = 'male';
  amount: number = 7.5;
  currentDate: number = Date.now();

  company: string = 'Localizely';
  footerMessage: string = $localize`:Component argument message example@@message.component-argument:Made with ❤️ by ${this.company}`;
}
Note: The presented language selection is not operational in development mode because of limitations imposed by the development server.
Handle text directionality
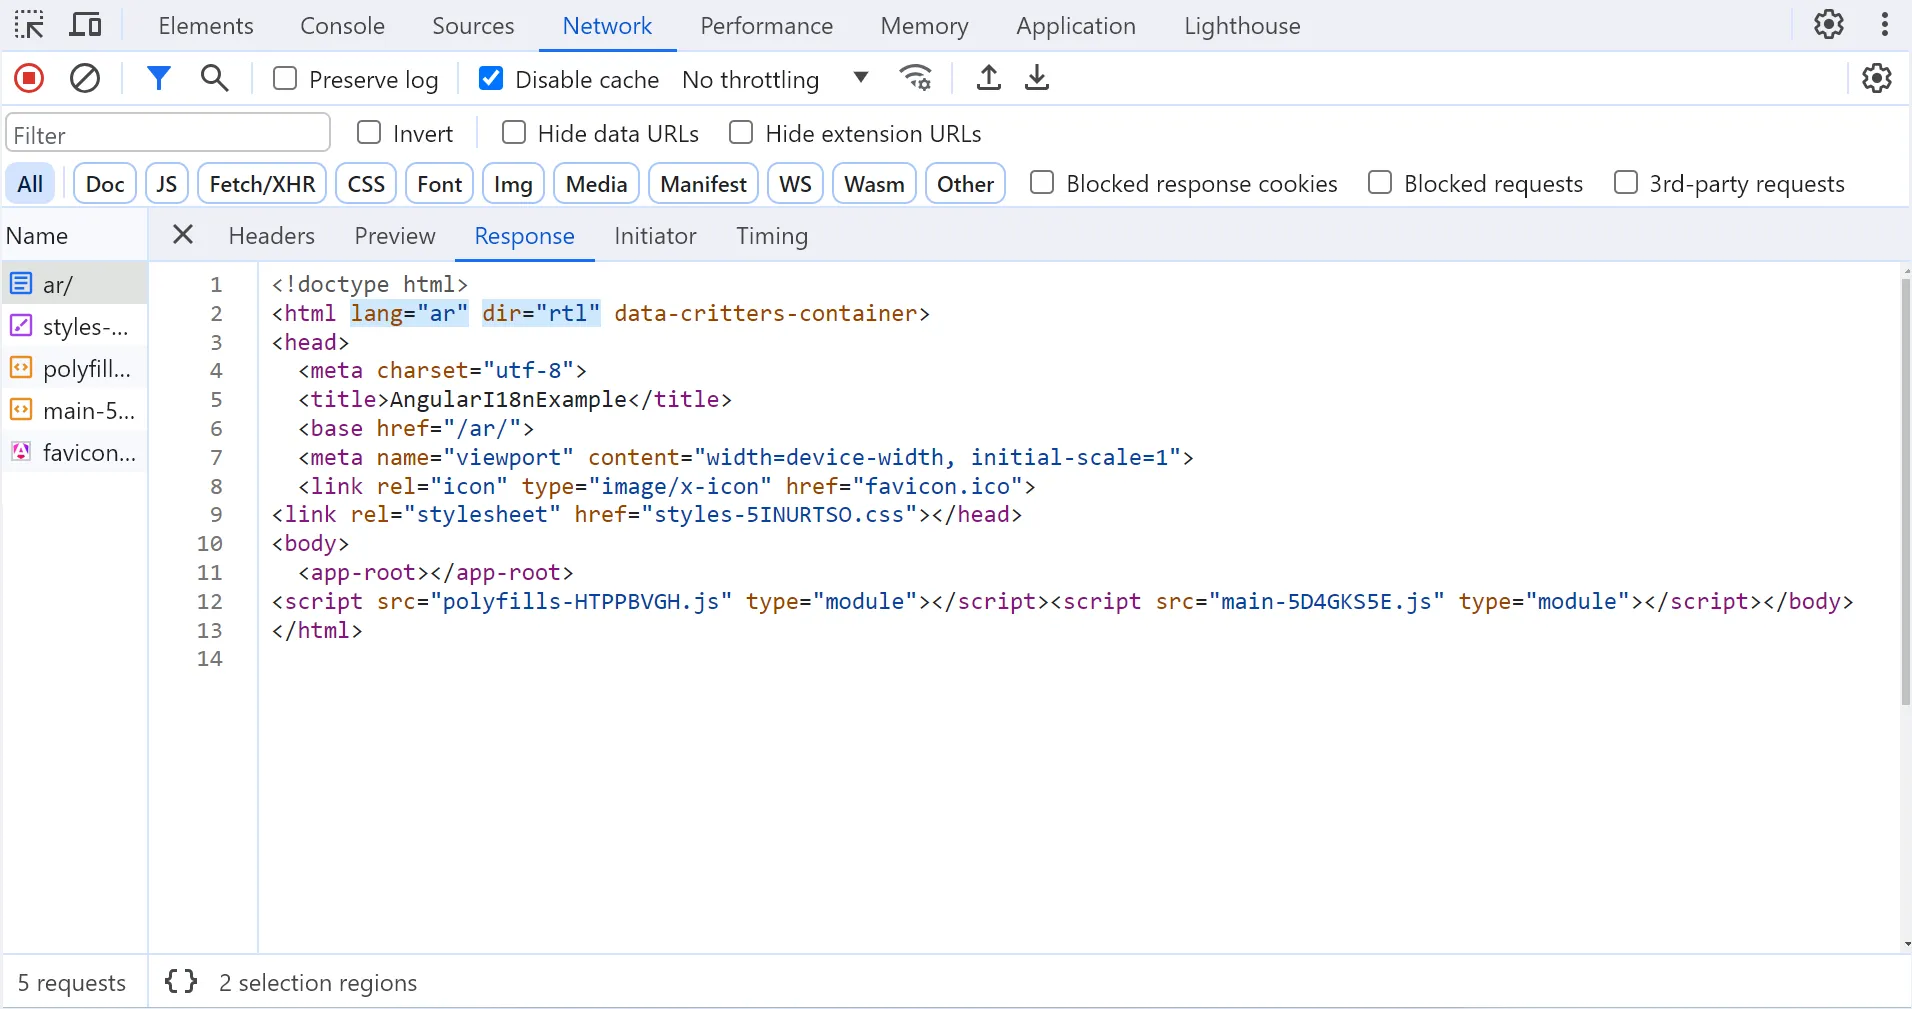
Text directionality is a crucial aspect of software localization. While many languages adopt a Left-to-Right (LTR) orientation, which often doesn't require special handling, the significance of text direction becomes paramount for languages that use a Right-to-Left (RTL) orientation.
Angular proactively manages text directionality by setting the appropriate direction on the html element, depending on the language displayed on the page. Since HTML elements inherit directionality from their parent elements unless explicitly defined, this approach is mostly effective. Nevertheless, it is recommended to implement flexible layouts in your applications. This practice helps prevent layout issues that may arise due to changes in text directionality.
Access locale
Occasionally, you may encounter situations where it's necessary to implement logic specific to the locale currently active in your app. Fortunately, accessing this locale is straightforward — you can inject it directly into the component. The example below demonstrates how to do that.
import { Component, Inject, LOCALE_ID } from '@angular/core';

...
export class AppComponent {
  constructor(@Inject(LOCALE_ID) public locale: string) {}

  ...
}
Conclusion
In this post, we explore the @angular/localize package and demonstrate how to use it for internationalizing Angular applications. A significant challenge in this process often lies in translating XLIFF files. These files, packed with extensive data, can pose comprehension difficulties for translators. Moreover, given their nature as XML files, manual edits risk introducing issues such as invalid file syntax. Professional tools offer a robust solution to these challenges. Among these, the Localizely platform stands out for its support of various localization formats, including XLIFF. It simplifies the process of uploading and downloading translation files, enables seamless collaboration with team members, and facilitates setting up Over-the-air translation updates through S3 integration, among other features.
Like this article? Share it!
Zoran is a Software Engineer at Localizely. His primary interest is web development, but he also has a solid background in other technologies. For the last few years, he has been involved in the development of software localization tools.
Enjoying the read?
Subscribe to the Localizely blog newsletter for quality product content in your inbox.

Resources
- What is Localizely?
- Getting started
- Localization workflow
- Translation editor
- Flutter Over-the-Air updates
- Flutter In-Context Editing
- Project branching
- Public projects
- Professional translation services
- Machine Translation
- AI Translation
- Translation Memory
- Glossary
- Tasks
- Reports and statistics
- Figma integration
- AWS S3 integration
- GitHub integration
- GitLab integration
- Bitbucket integration
- CLI
- Configuration file
- Supported file formats
- Language & Country Codes
- Referral Program
- Affiliate Program
- I18N Questions
- FAQ
Free tools
- ICU message for translators
- ICU message editor
- Hreflang generator
- Hreflang checker
- JSON Flattener
- JSON Validator
- YAML Validator
- XML Validator
- CSV Validator
- Text Compare
- Text Encoding Converter
- Localization File Converter
- JSON Word Counter
- ARB Word Counter
- Translation Cost Calculator