AWS S3 Integration
Documentation
- What is Localizely?
- Getting started
- Localization workflow
- Translation editor
- Flutter Over-the-Air updates
- Flutter In-Context Editing
- Project branching
- Public projects
- Professional translation services
- Machine Translation
- AI Translation
- Translation Memory
- Glossary
- Tasks
- Reports and Statistics
- Figma integration
- AWS S3 integration
- GitHub integration
- GitLab integration
- Bitbucket integration
- CLI
- Configuration file
- Supported file formats
- Language & Country Codes
- Referral Program
- Affiliate Program
- FAQ
Introduction
Use this integration to synchronize translation files between your AWS S3 bucket and Localizely project.
Once you configure the integration, you can push the files directly to your AWS S3 bucket by using the Localizely web console, so your apps can fetch them in runtime.
Setup
The requirement is that your AWS IAM user, that you plan to use for this integration, has s3:PutObject permission. We highly recommend creating and using a separate IAM user (access key ID and secret access key) for this integration, which you can configure via AWS IAM service.
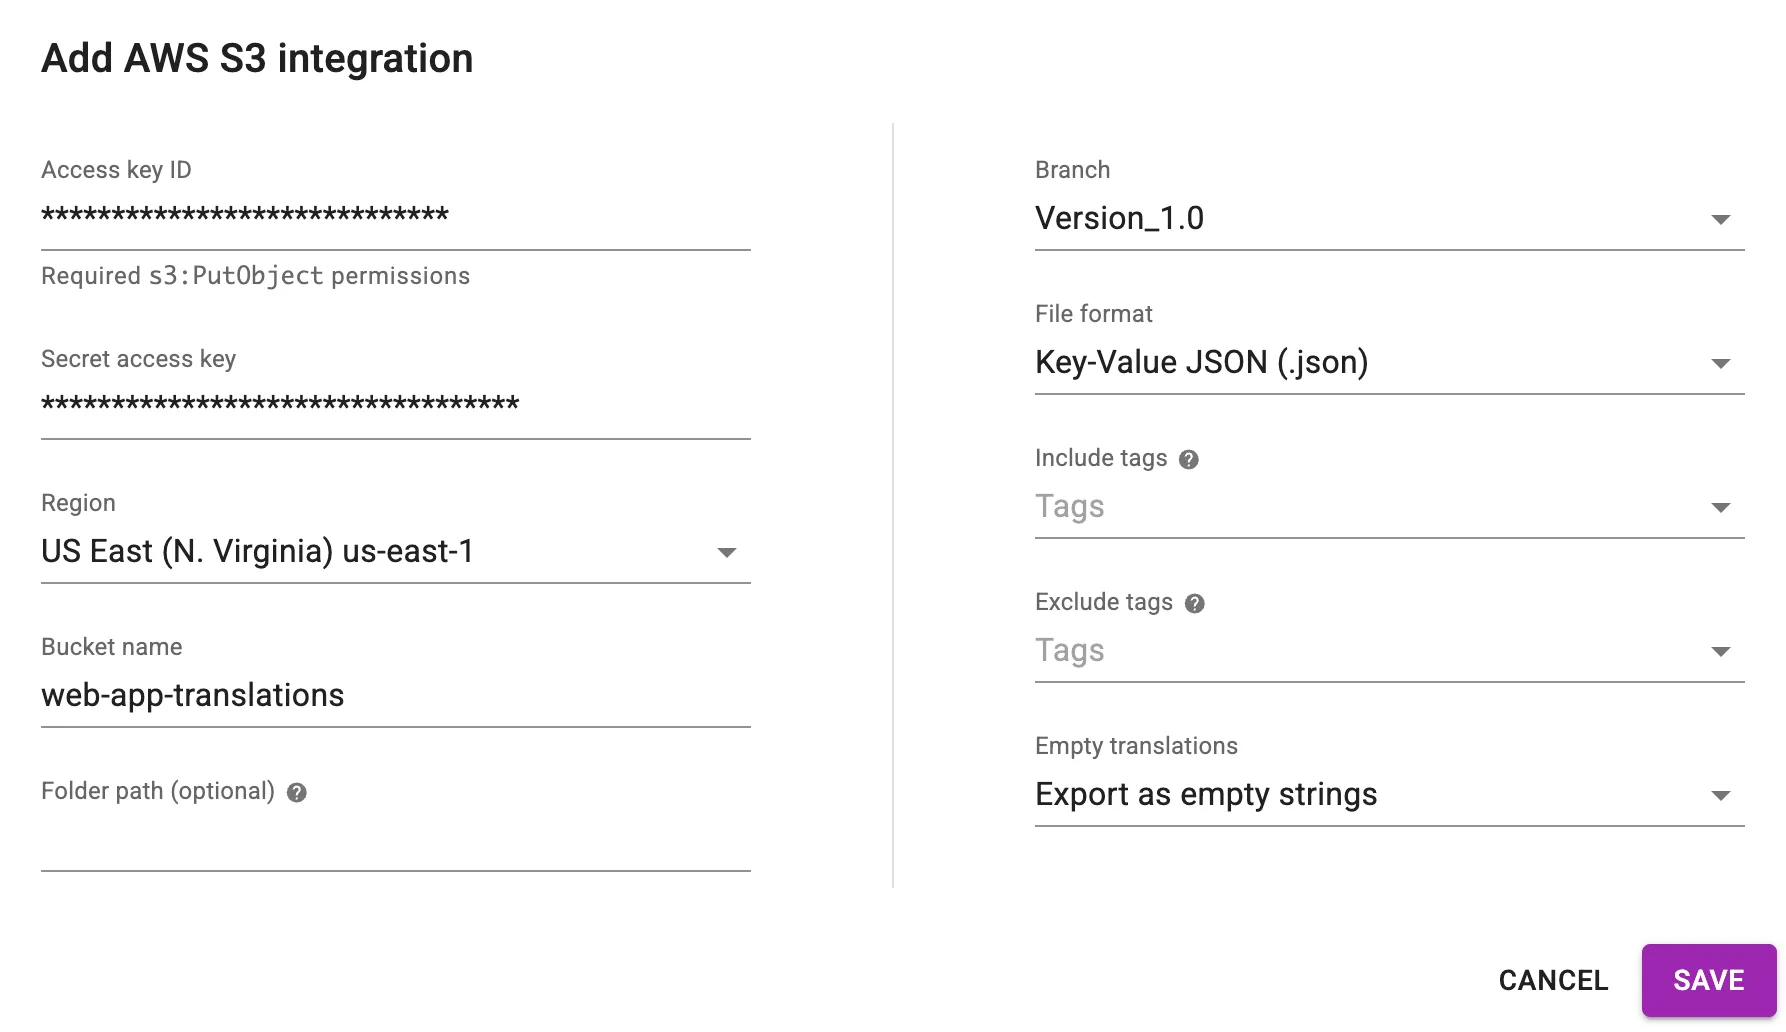
Go to the settings for the Localizely project and select AWS S3 Integration under the Integrations section.
- Paste dedicated AWS access key ID and secret access key.
- Choose the AWS region your S3 bucket belongs to.
- Insert the S3 bucket name.
- Optionaly, you can define the folder path in your S3 bucket to which your localization files will be uploaded. By default, it uploads the files to the root folder.
- On the right side choose how to export files from Localizely. The similar way you download files to your source code repository.
- Click Save.
Your access key ID and secret access key are safe, they are stored in an encrypted form in our system.
Push files to S3
Go to Project Settings > Integrations > AWS S3, and click the Push now button.
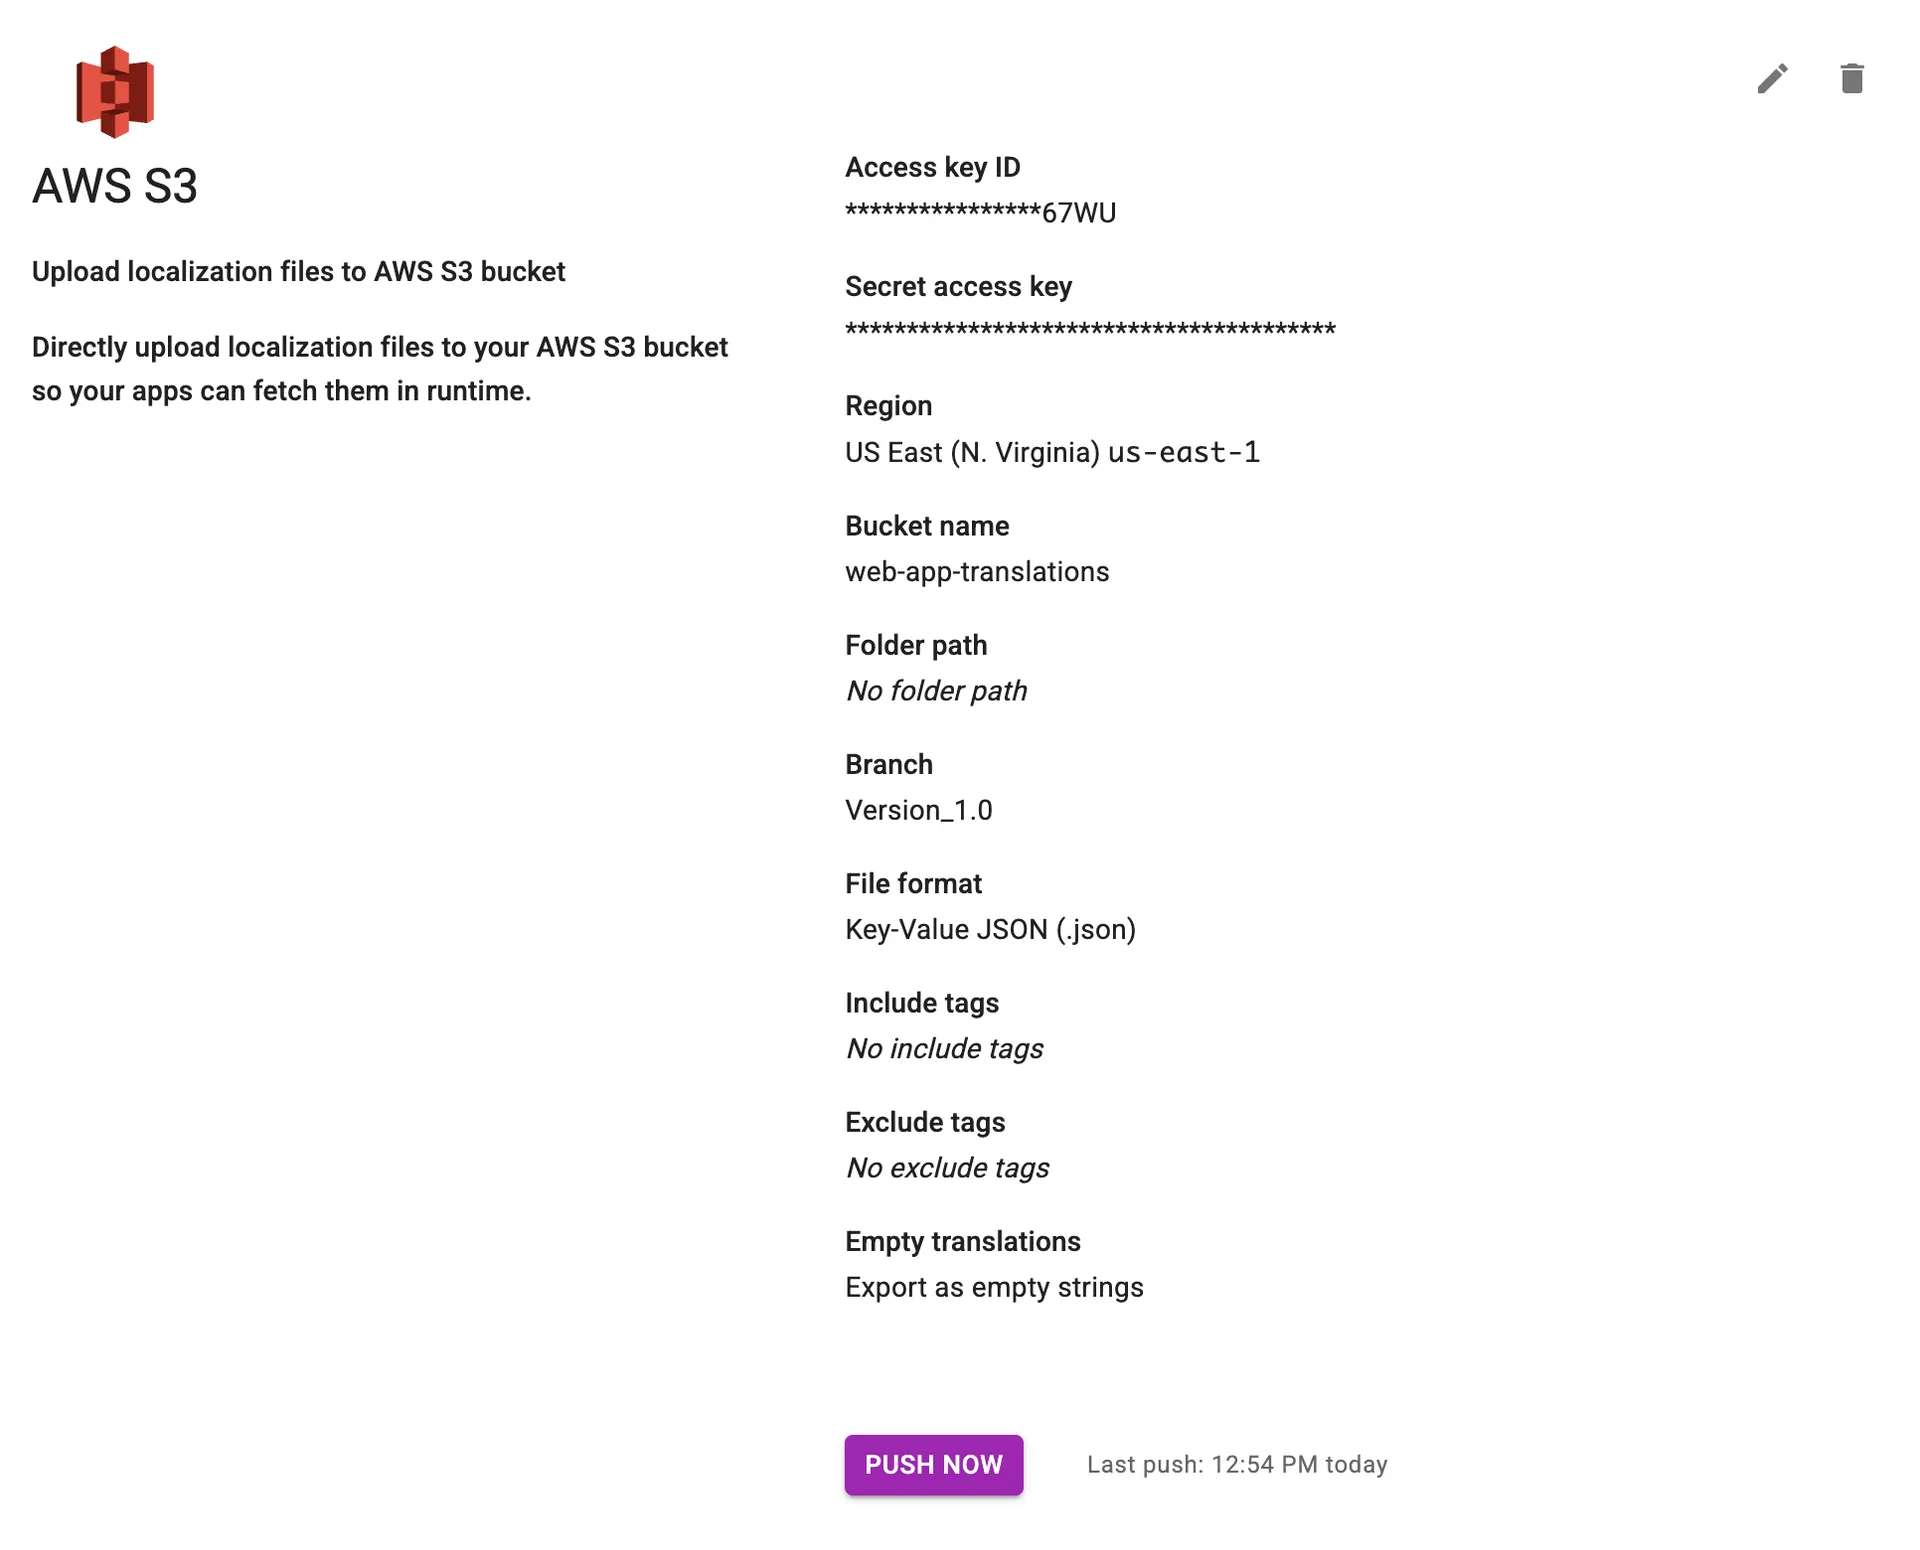
Next to the Push now button you will see the time you pushed the files last time to S3 bucket.
Previous: Figma integration
Read next: GitHub integration
Tired of manually editing translation files?
Our platform streamlines software localization for you.
Documentation
- What is Localizely?
- Getting started
- Localization workflow
- Translation editor
- Flutter Over-the-Air updates
- Flutter In-Context Editing
- Project branching
- Public projects
- Professional translation services
- Machine Translation
- AI Translation
- Translation Memory
- Glossary
- Tasks
- Reports and Statistics
- Figma integration
- AWS S3 integration
- GitHub integration
- GitLab integration
- Bitbucket integration
- CLI
- Configuration file
- Supported file formats
- Language & Country Codes
- Referral Program
- Affiliate Program
- FAQ
Resources
- What is Localizely?
- Getting started
- Localization workflow
- Translation editor
- Flutter Over-the-Air updates
- Flutter In-Context Editing
- Project branching
- Public projects
- Professional translation services
- Machine Translation
- AI Translation
- Translation Memory
- Glossary
- Tasks
- Reports and statistics
- Figma integration
- AWS S3 integration
- GitHub integration
- GitLab integration
- Bitbucket integration
- CLI
- Configuration file
- Supported file formats
- Language & Country Codes
- Referral Program
- Affiliate Program
- I18N Questions
- FAQ
Free tools
- ICU message for translators
- ICU message editor
- Hreflang generator
- Hreflang checker
- JSON Flattener
- JSON Validator
- YAML Validator
- XML Validator
- CSV Validator
- Text Compare
- Text Encoding Converter
- Localization File Converter
- JSON Word Counter
- ARB Word Counter
- Translation Cost Calculator