
Figma Integration
Start localization in the design phase and see how your designs look in every language.
Documentation
- What is Localizely?
- Getting started
- Localization workflow
- Translation editor
- Organizations
- Flutter Over-the-Air updates
- Flutter In-Context Editing
- Project branching
- Public projects
- Professional translation services
- Machine Translation
- AI Translation
- Translation Memory
- Glossary
- Tasks
- QA checks
- Reports and Statistics
- Figma integration
- AWS S3 integration
- GitHub integration
- GitLab integration
- Bitbucket integration
- CLI
- Configuration file
- Supported file formats
- Universal placeholders
- Language & Country Codes
- Referral Program
- Affiliate Program
- FAQ
The Localizely plugin for Figma connects your designs to your localization project. Push design texts from Figma to Localizely for translation, then pull the translations back into Figma to preview localized screens. Text that overflows, wraps awkwardly, or reads wrong in another language shows up while the design is still easy to change, long before it reaches development.
With the plugin, you can:
- Preview how your designs look in multiple languages
- Push design texts from Figma to your Localizely project
- Create new string keys in Localizely straight from Figma
- Pull translated texts from Localizely back into your Figma designs
In this article
Install the plugin
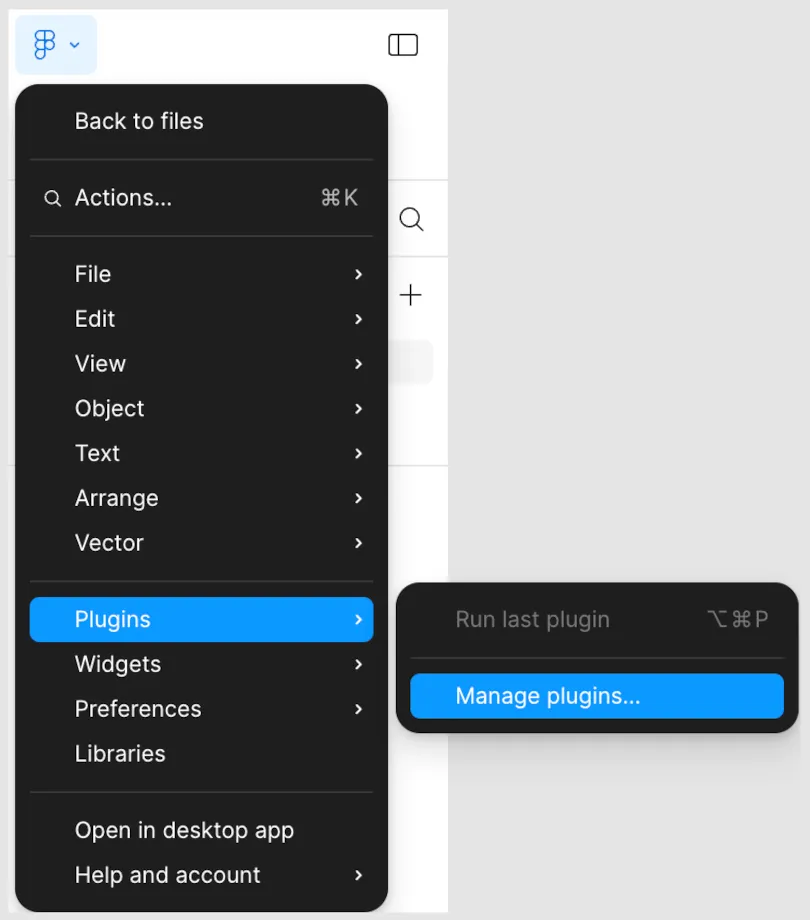
Open your Figma file and go to Menu > Plugins > Manage plugins...
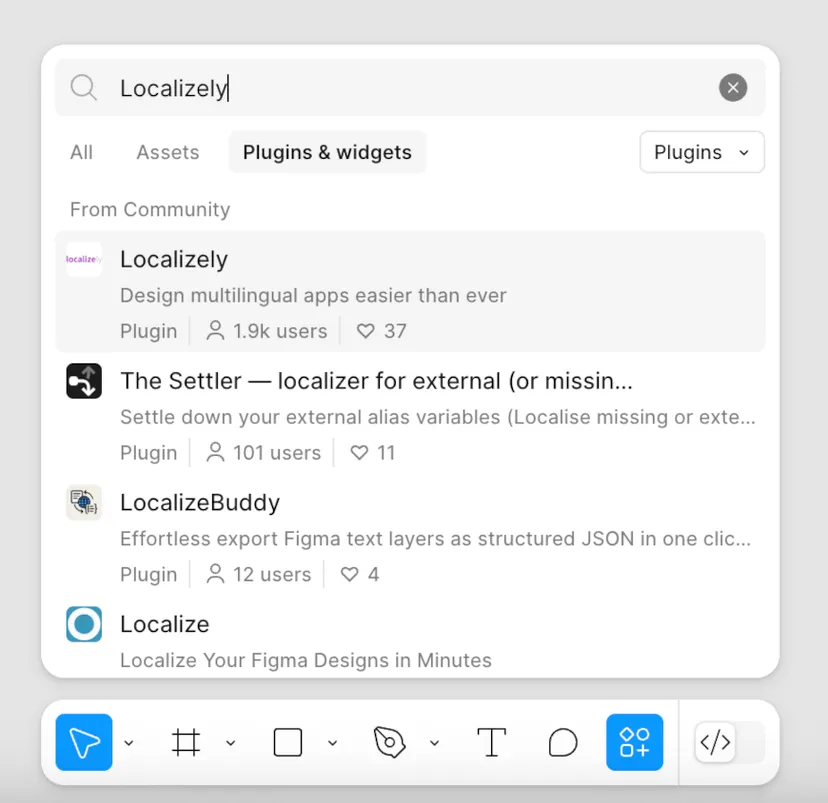
Type "Localizely" into the search box and select the plugin from the results.
On the plugin details page, click Run.
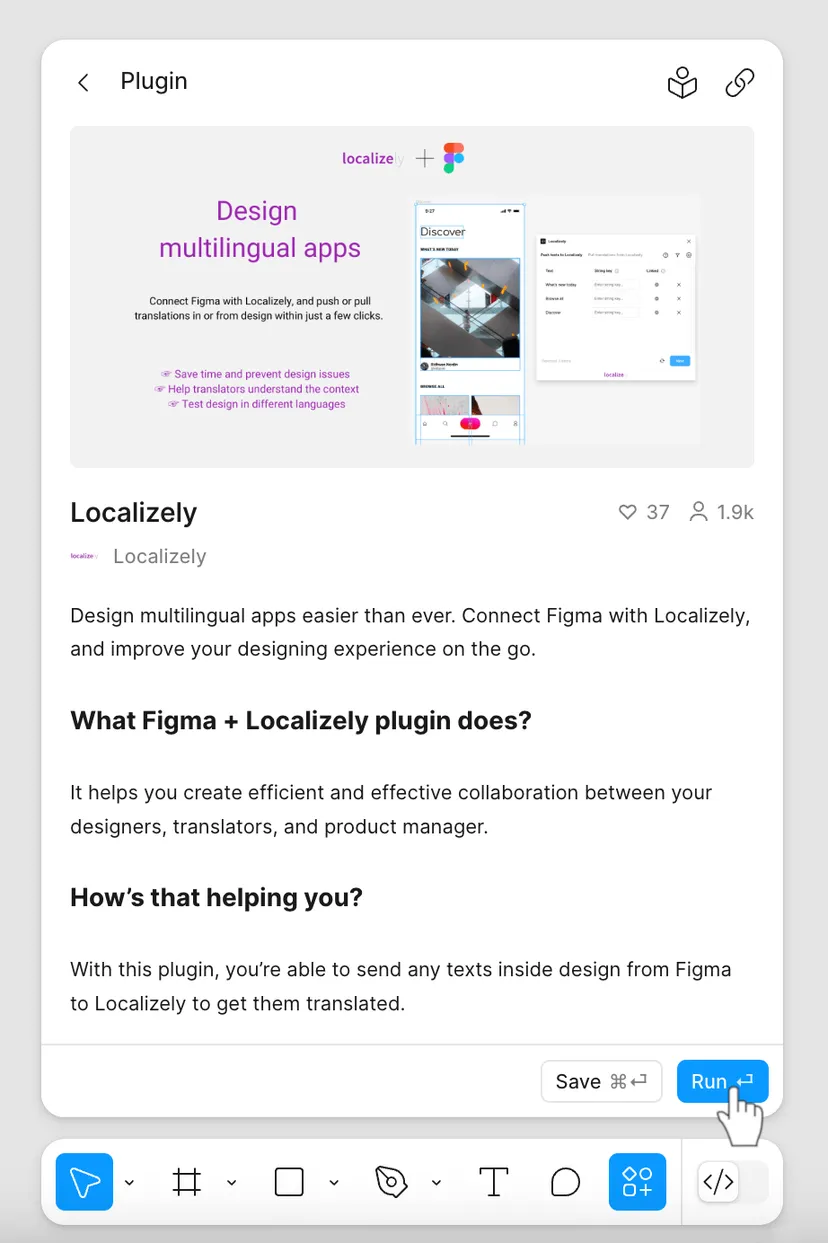
The plugin is now running and ready to be connected to your Localizely project.
Connect Figma with Localizely
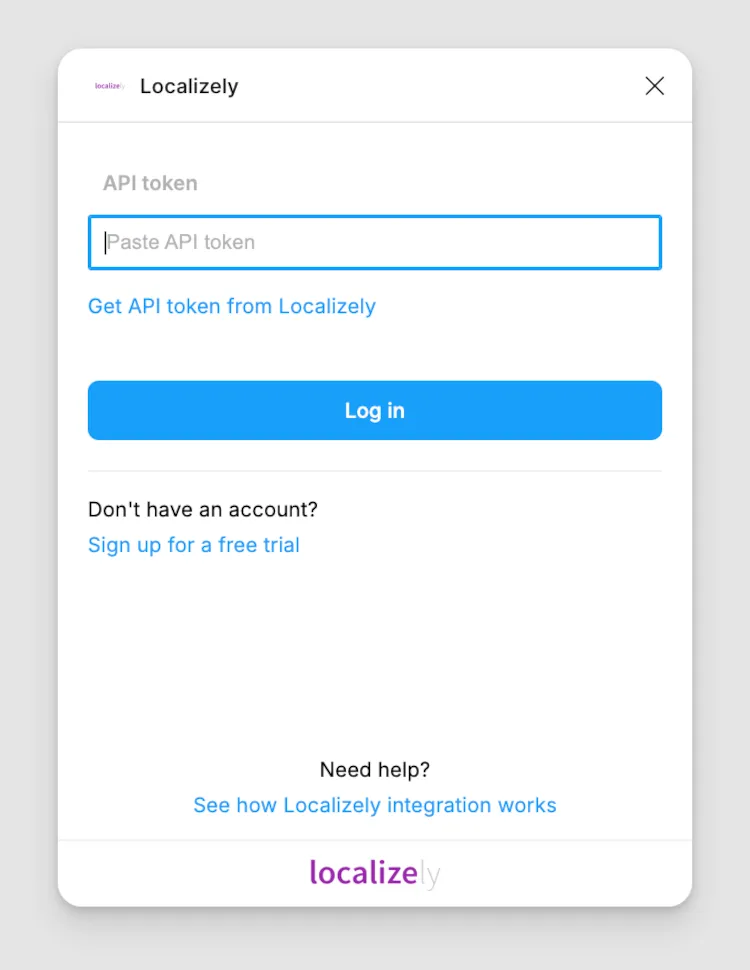
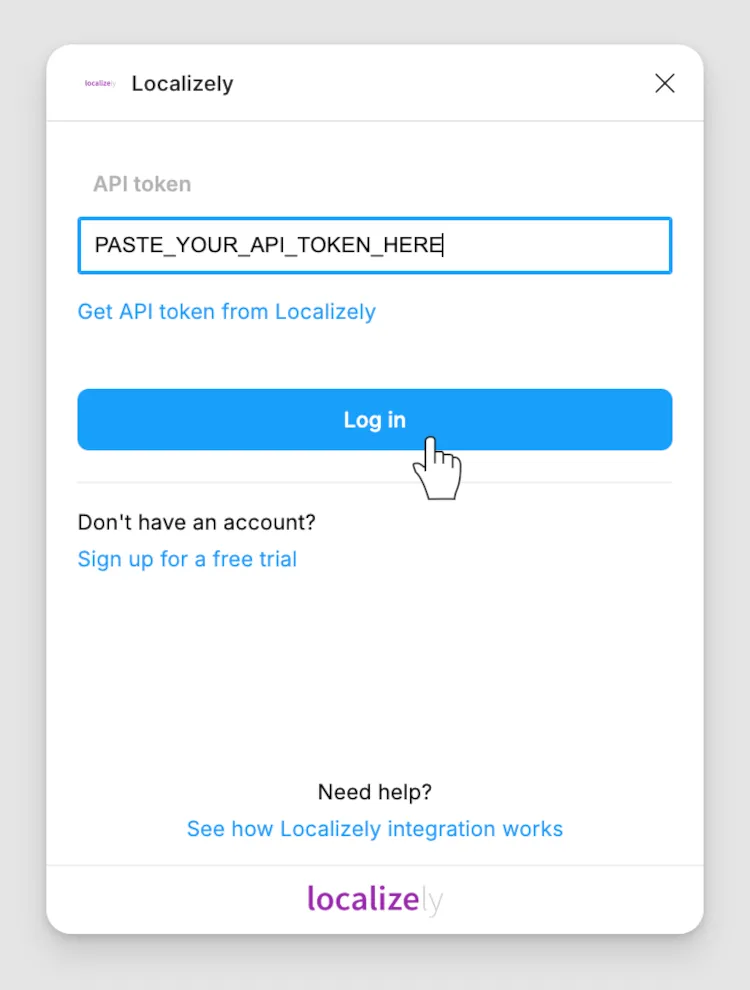
The plugin signs in with a Localizely API token. In the plugin, click Get API token from Localizely to open Localizely in your browser. If you don't have an account yet, click Sign up for a free trial instead and create one first.
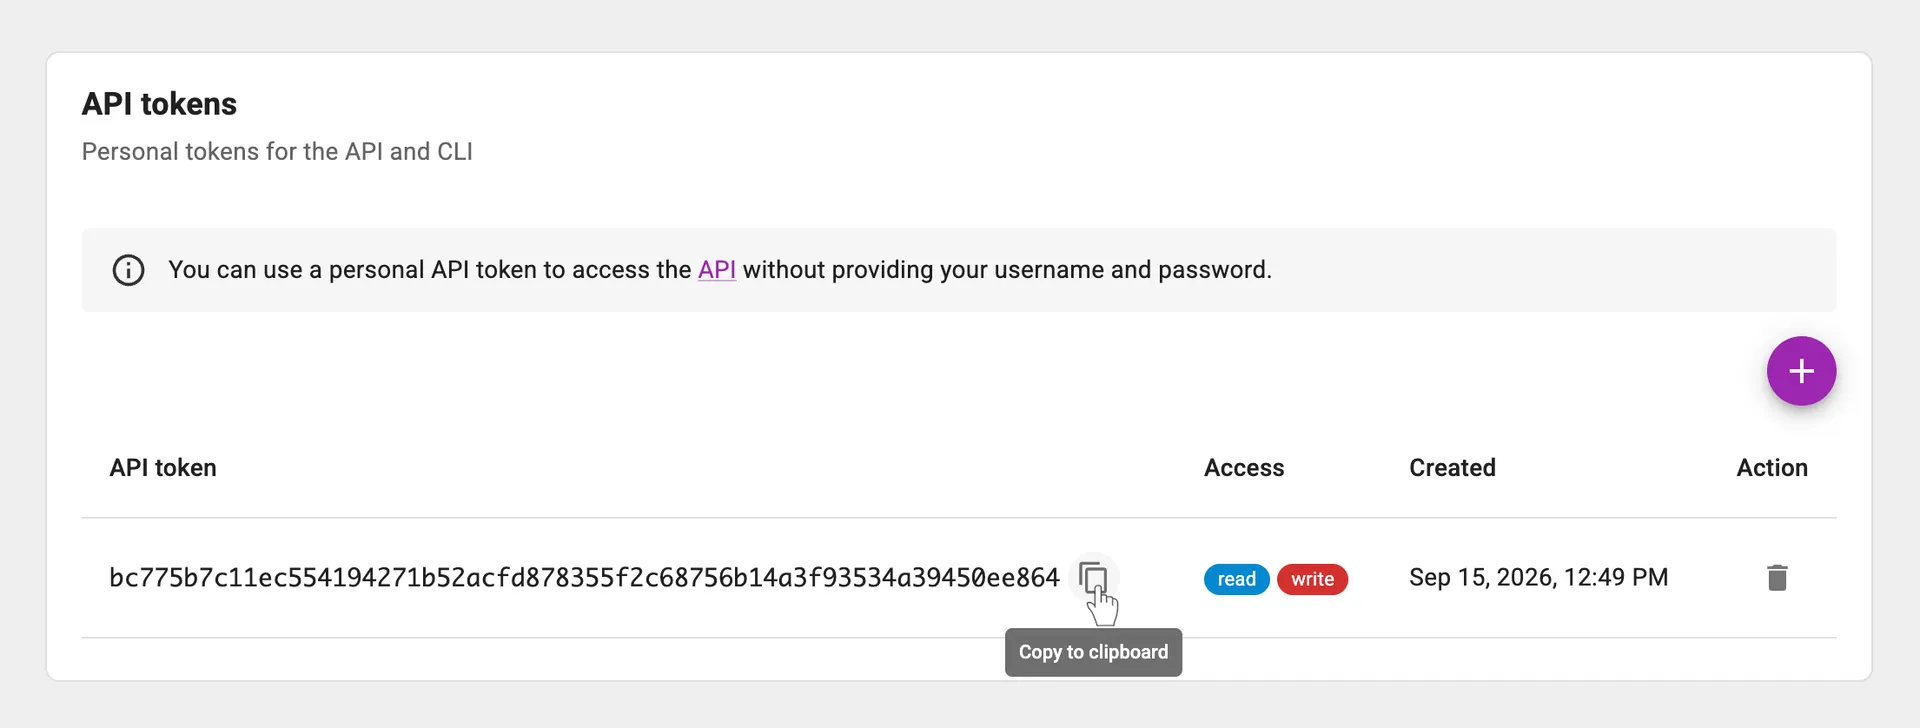
On the My profile page in Localizely, click the button next to your API token to copy it.
Back in the plugin, paste the token into the API token field and click Log in.
The last step is the project setup. Choose the Localizely project the design belongs to, the branch if the project uses branching, and the language your design is written in. Then pick a string key naming pattern. The plugin uses it whenever it generates string keys for you, so choose the one that matches the naming convention in your code. Leave Sync text formatting enabled to keep bold, italic, and bold-italic styling intact when texts travel between Figma and Localizely.
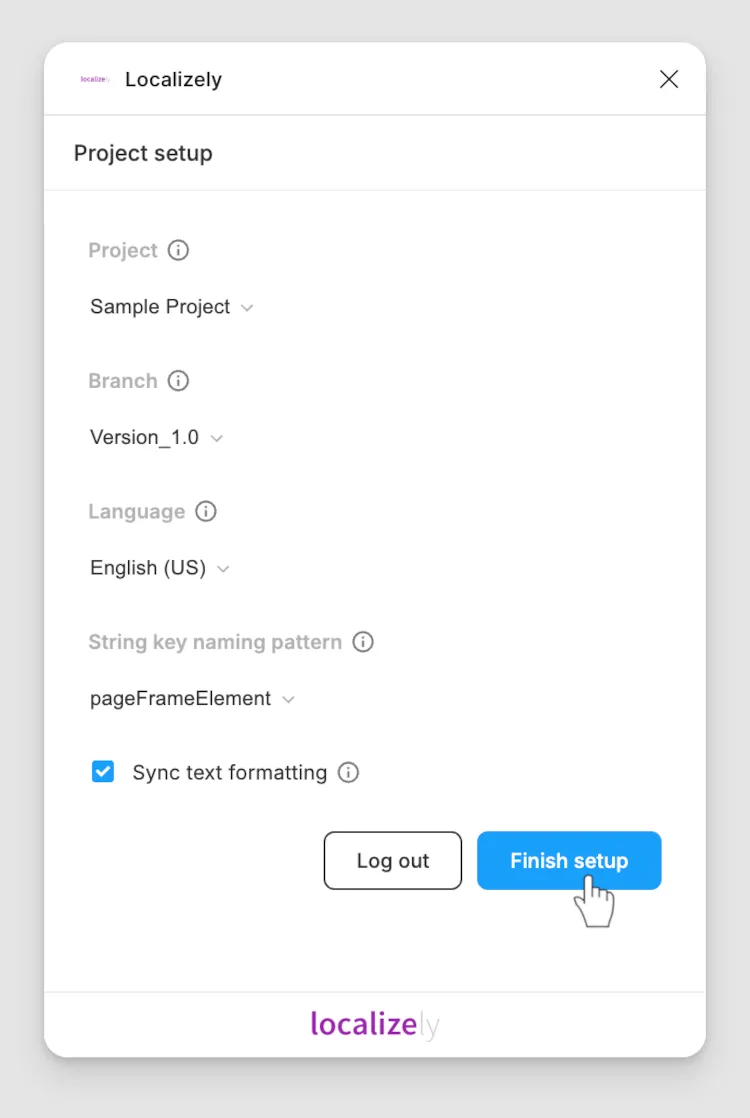
Click Finish setup and you are ready to go.
How to use the plugin
Prepare your design content
Select any frames or layers in Figma and the text elements inside your selection appear in the plugin table. This is where you connect each text element to a string key in Localizely.
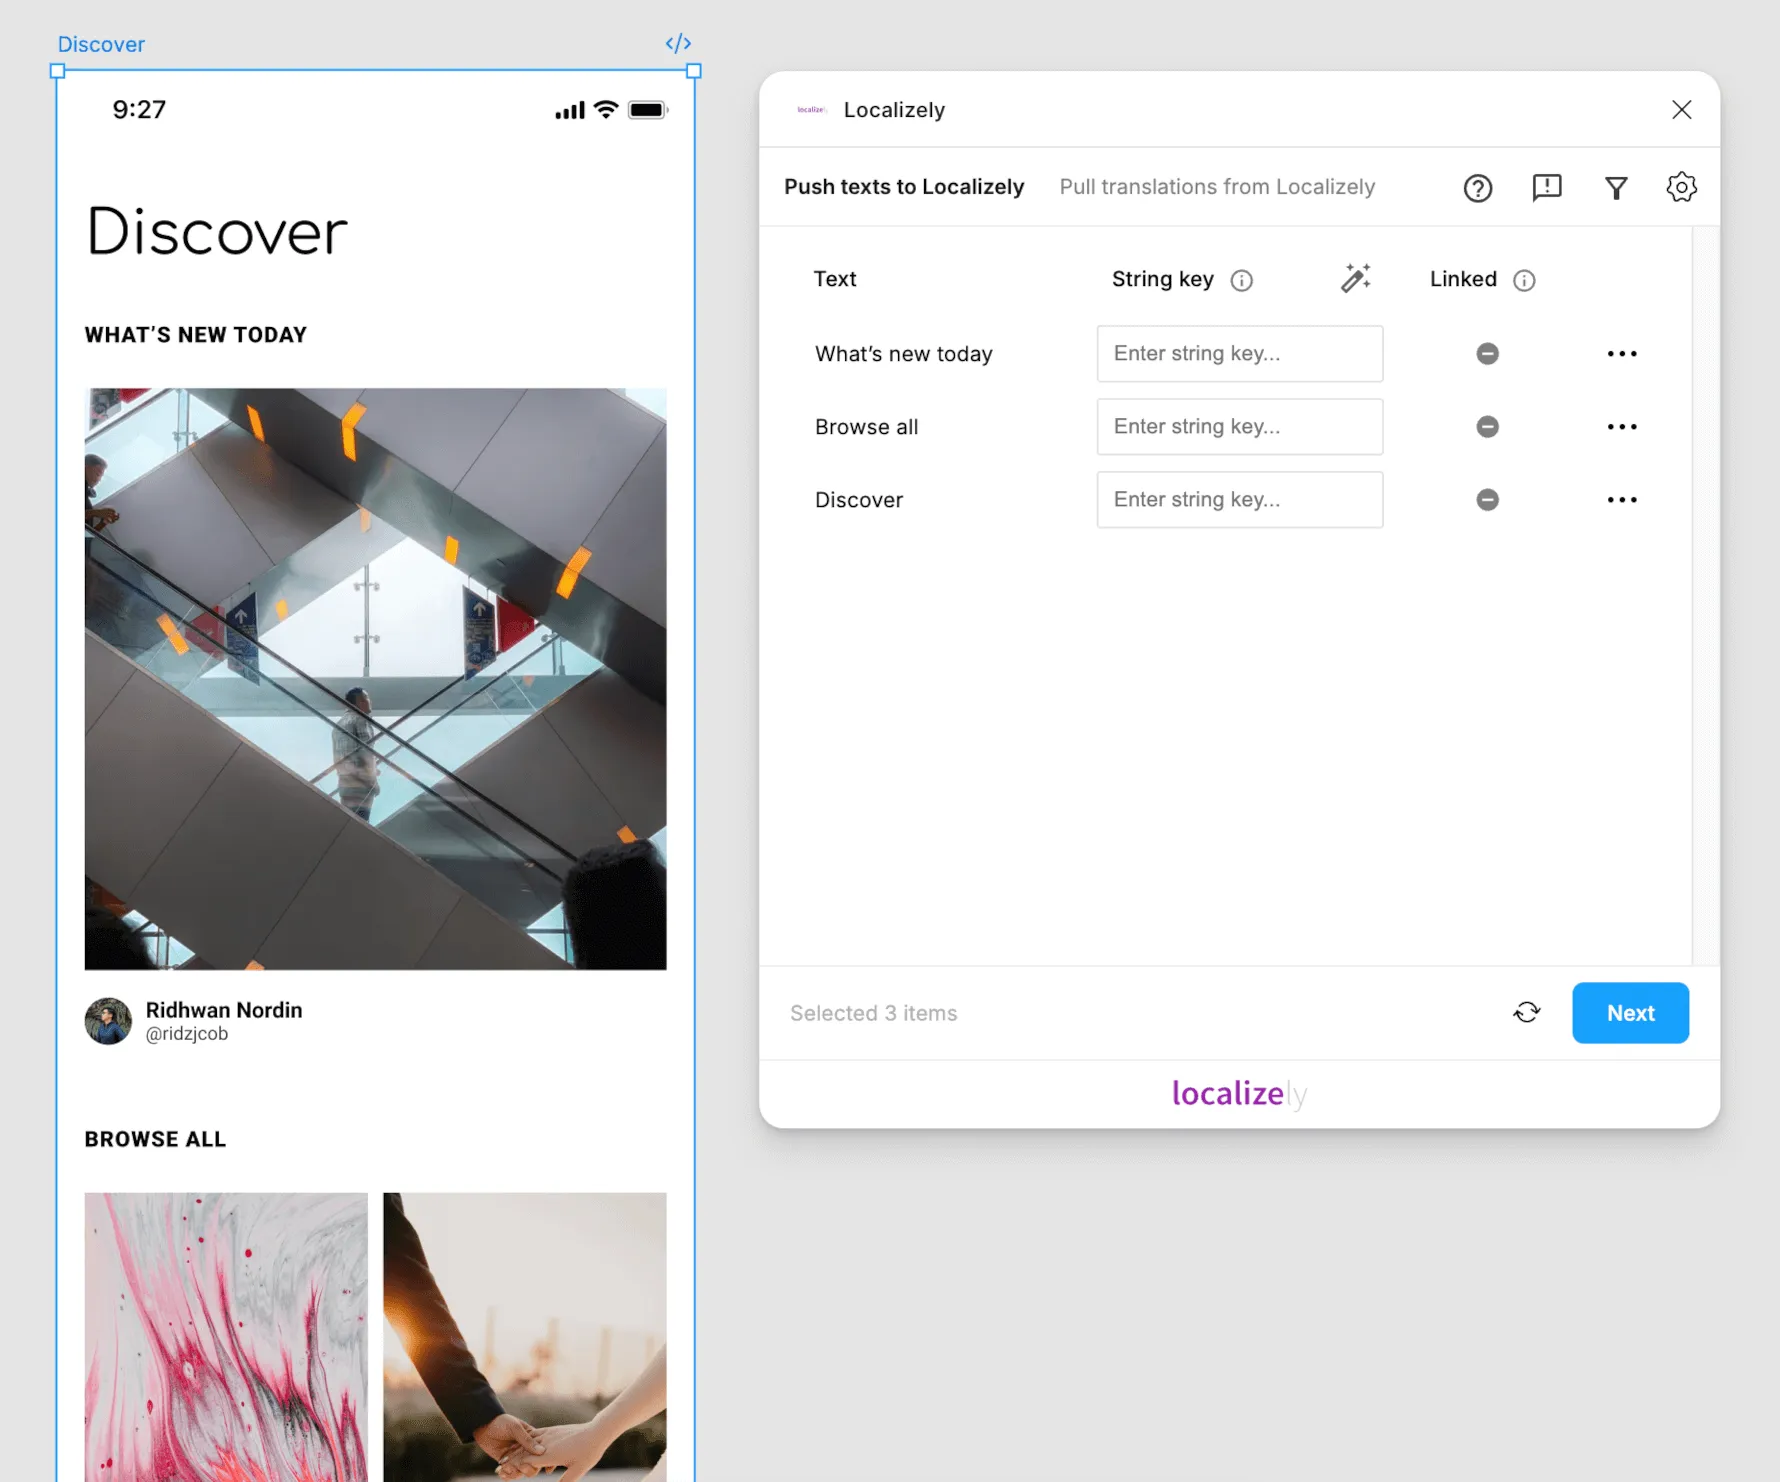
The table makes it obvious which texts still have no string key. Click the key field of a text to assign one. If a matching key already exists in your Localizely project, the plugin suggests it.
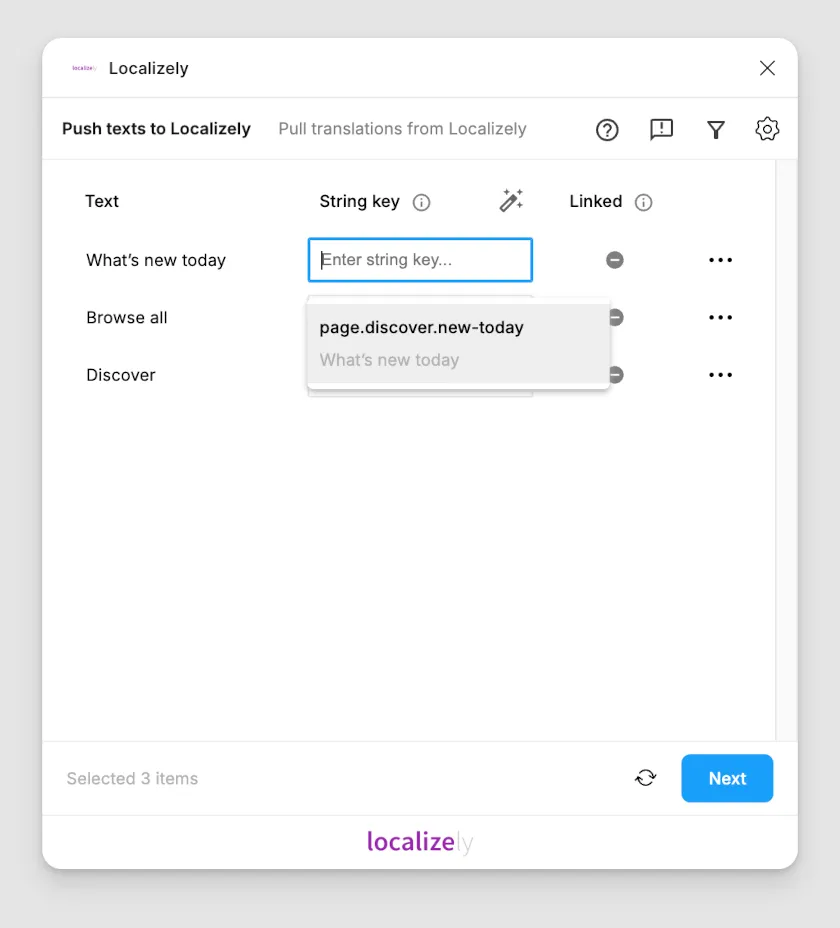
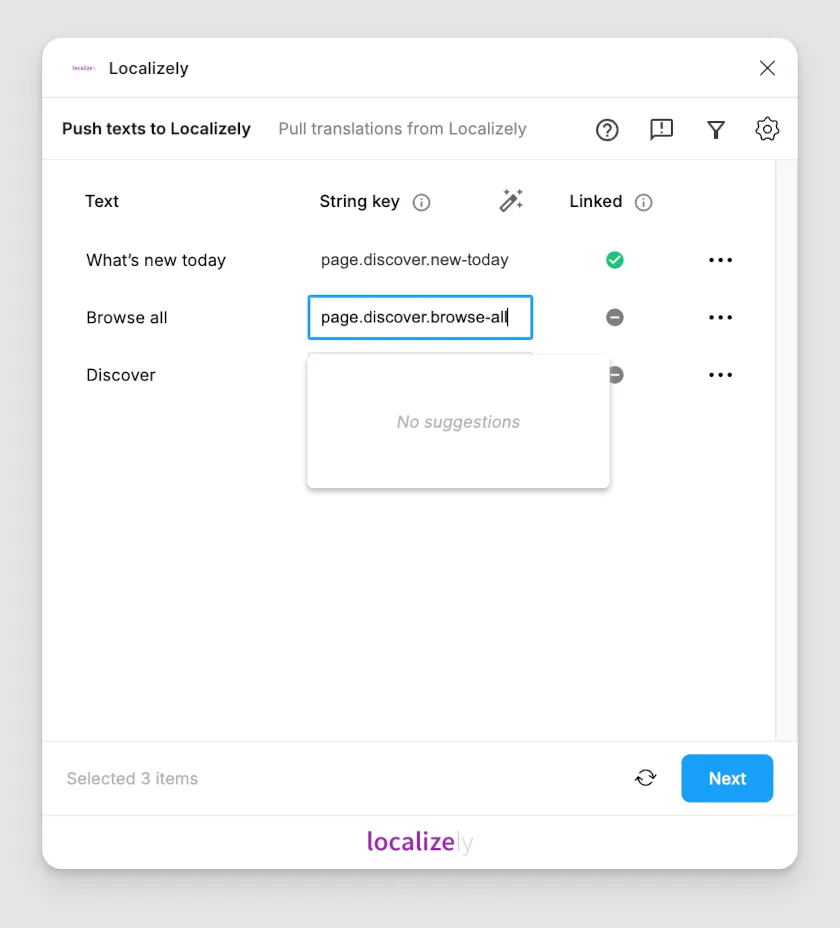
If there is no matching key, type a new one. The plugin creates it in your project the next time you push texts to Localizely.
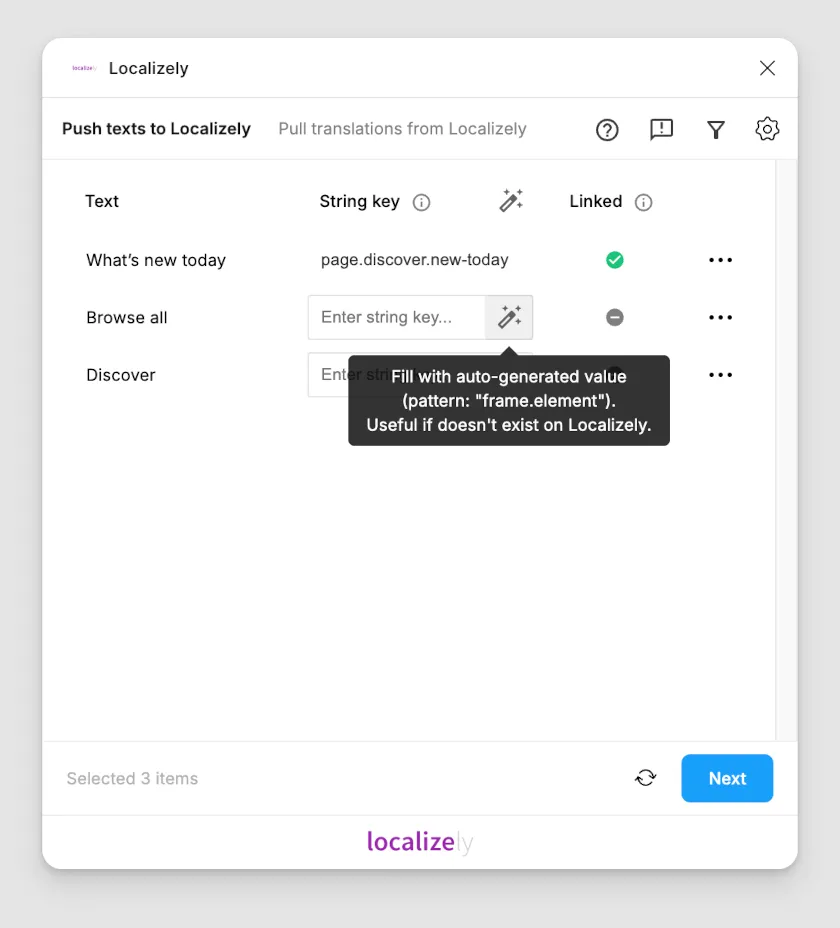
For a screen full of unnamed texts, let the plugin generate the keys. Auto-generation follows the string key naming pattern you chose during setup and works either for a single text element or for the whole selection at once.
Push content from Figma to Localizely
Switch to the Push texts to Localizely tab, make sure the texts you want to send are selected, and click Next to open the push configuration.
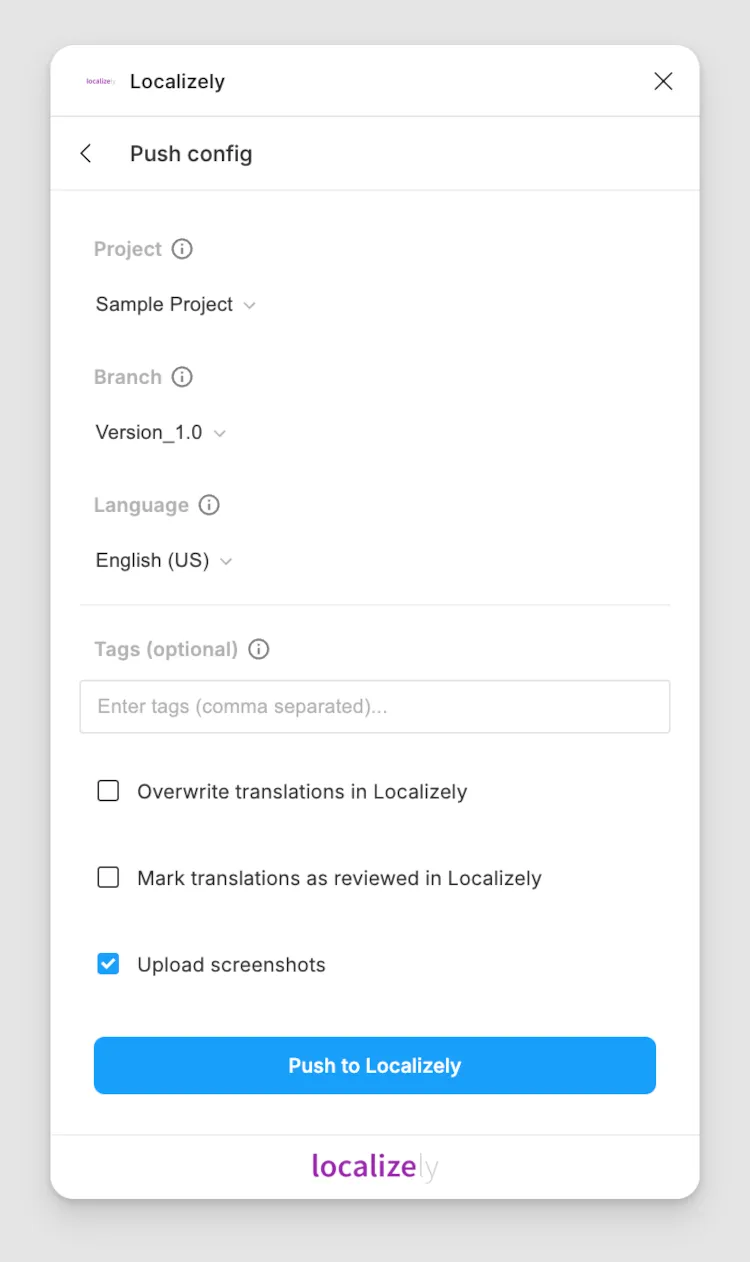
Here you confirm the project, the branch if the project uses branching, and the language of the texts. You can also add one or more tags, which are attached to every string key created by this push and make the new keys easy to find later.
Three options control what happens on the Localizely side:
- Overwrite translations in Localizely replaces existing translations in your project with the texts from your design. Leave it off to push only new texts.
- Mark translations as reviewed in Localizely marks the pushed translations as reviewed. This option is available only to users with the reviewer permission.
- Upload screenshots sends screenshots of your design, with the string keys marked on them, along with the texts. Translators see exactly where each text appears, which is the best context you can give them.
Click Push to Localizely. The texts land in your project and translators can start right away.
Translate
Translate the new texts in the Localizely translation editor, with your team, AI Translation, or professional translators, the same way you translate any other content.
Pull translations from Localizely to Figma
Once the translations are ready, select the Figma frames or layers you want to localize and switch to the Pull translations from Localizely tab.
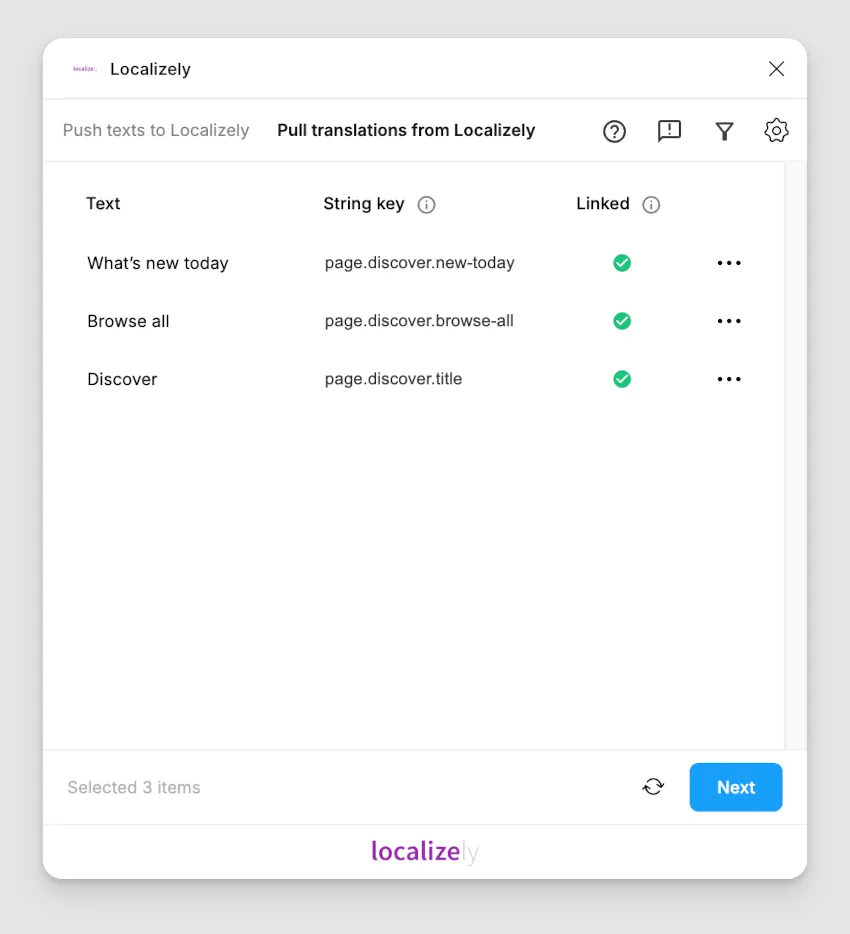
Click Next to choose how the translations should be applied.
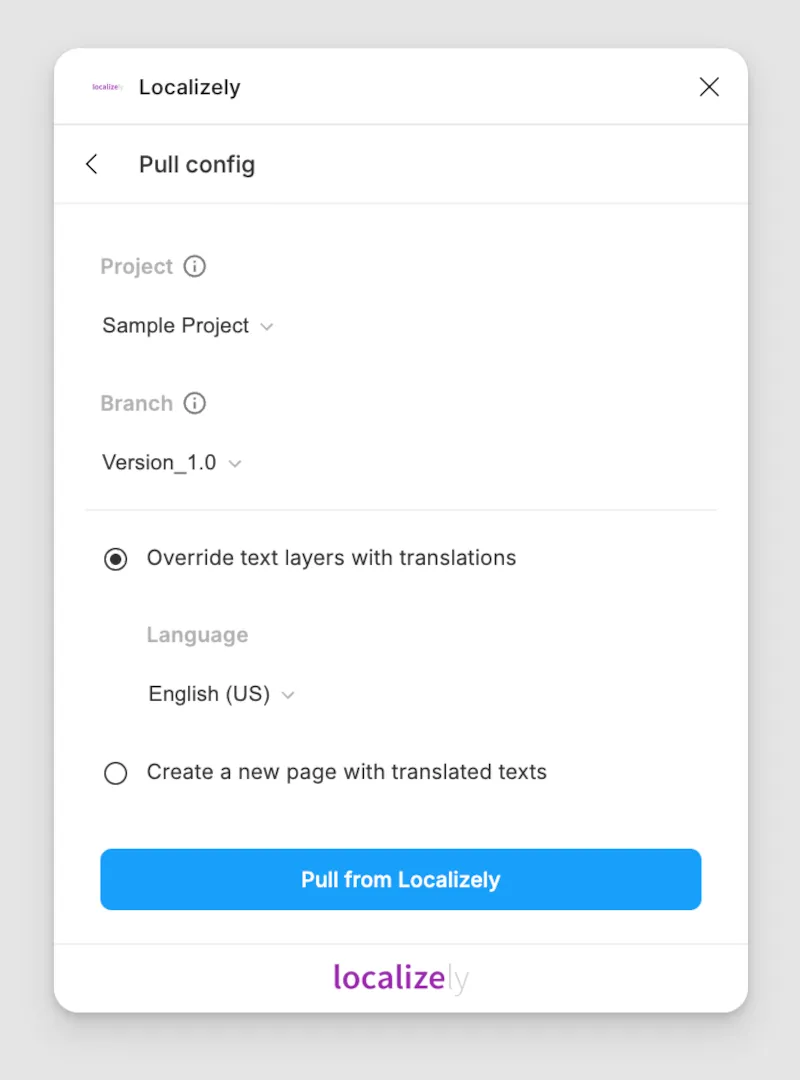
There are two ways to pull:
- Override text layers with translations replaces the texts on the current page with the translations for the language you pick.
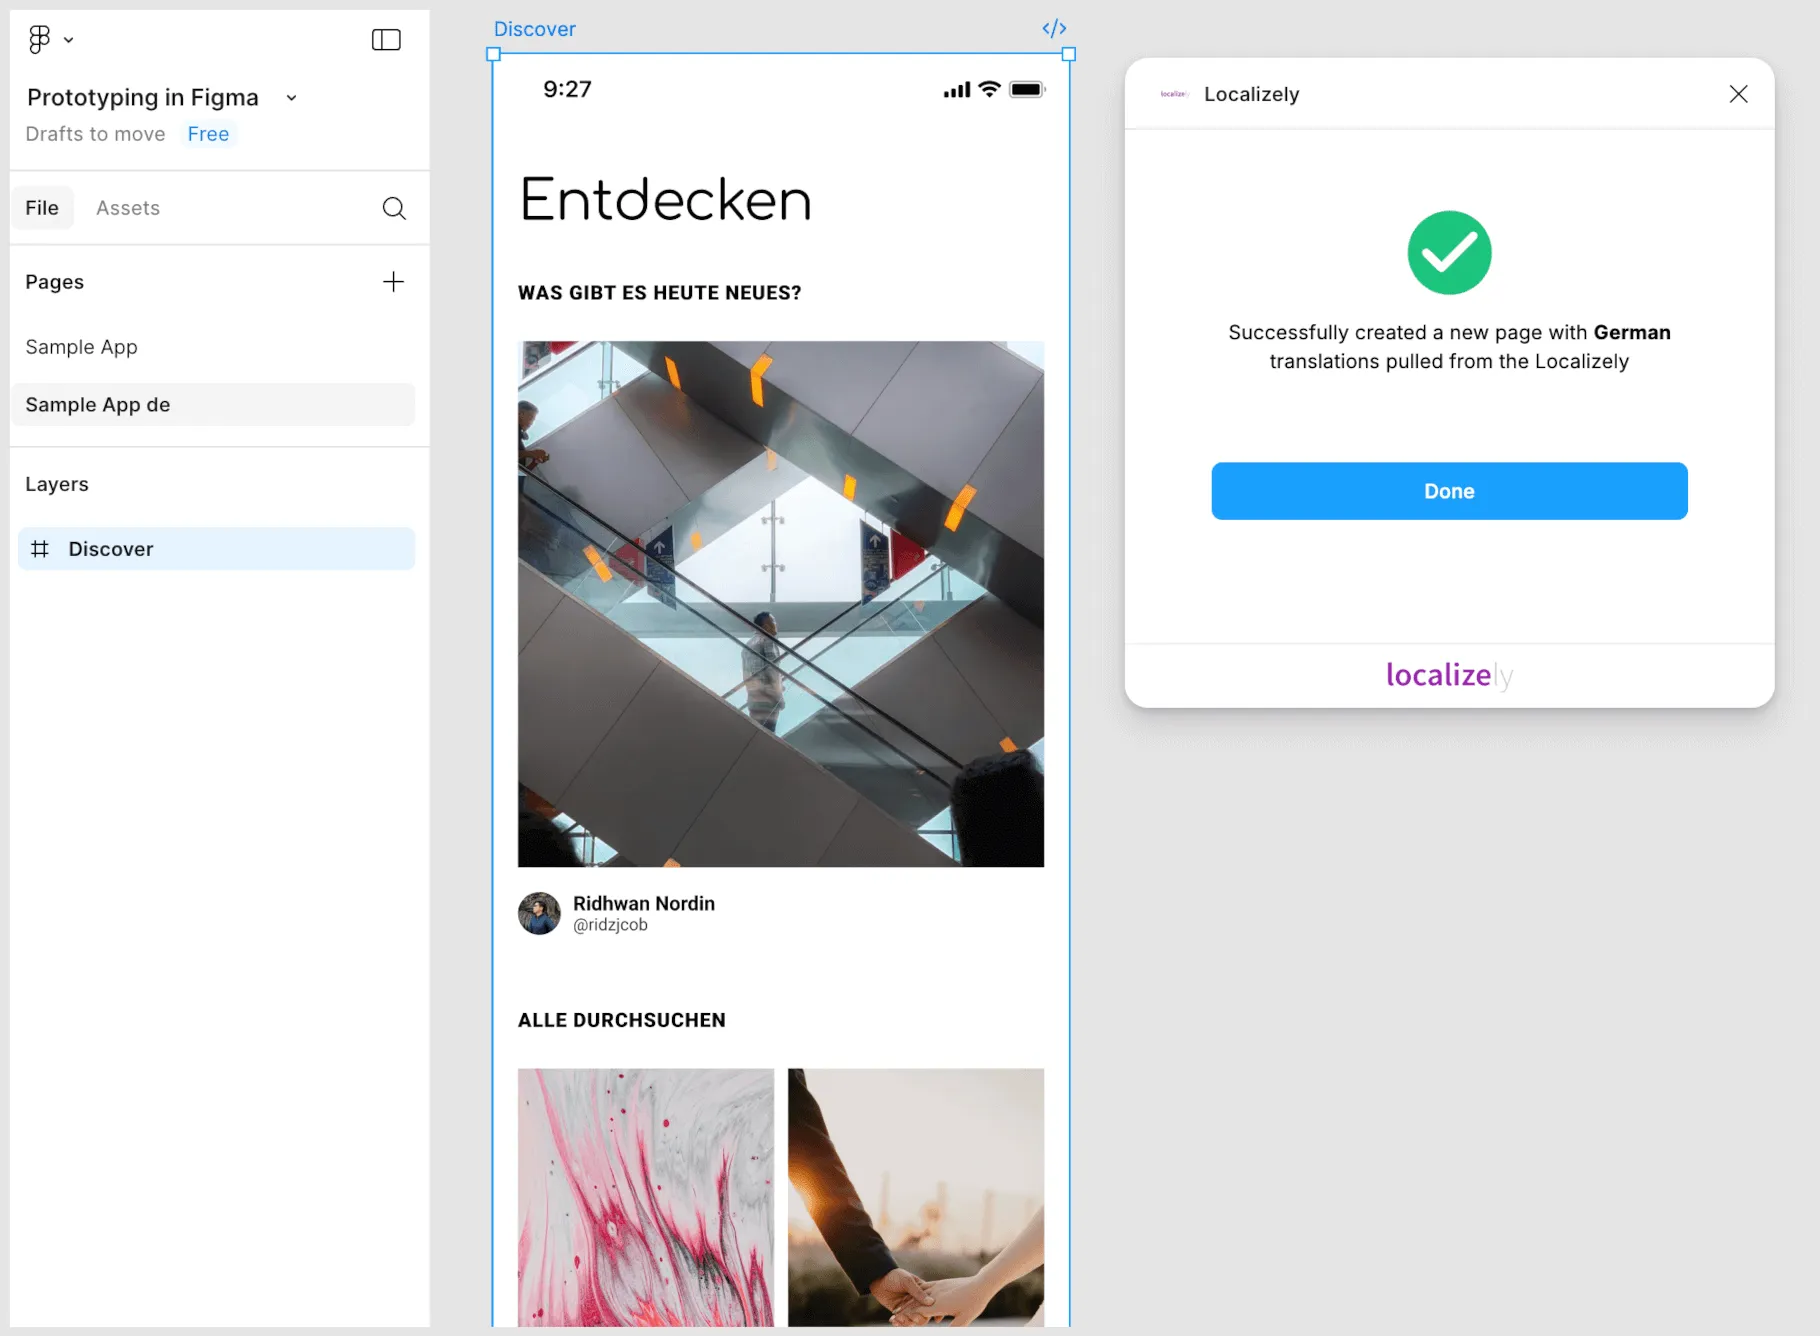
- Create a new page with translated texts leaves the current page untouched and adds a translated copy of it alongside your existing Figma pages.
The second option is the safer choice when you want to compare languages side by side. In the example below, the plugin created a copy of the page with German translations.
Previewing placeholders with sample values
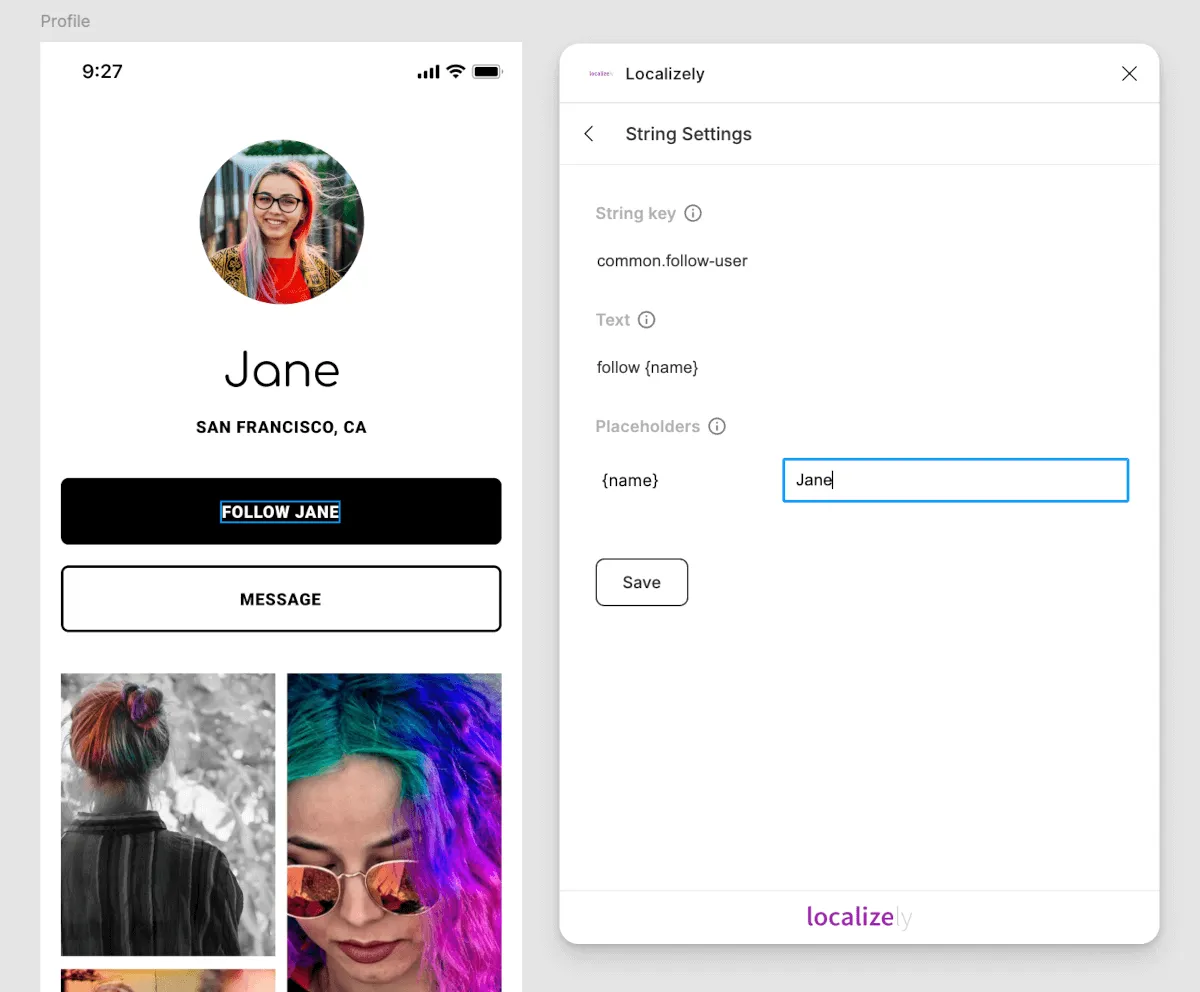
Localized texts often contain placeholders, values such as names, dates, numbers, or plural counts that the app fills in at runtime. A raw placeholder like {name} looks out of place in a design preview, so the plugin lets you give each placeholder a sample value that is shown instead.
Below, the design text "follow {name}" is previewed with the placeholder replaced by "Jane".
Note: Only placeholders with a sample value are replaced in the preview. To show a placeholder as is, leave its sample value empty.
Note: If you edit a text in Figma that already has a sample value for one of its placeholders, the plugin reports a conflict and asks you to resolve it before continuing.
Frequently asked questions
How does the plugin handle text elements with missing fonts?
The plugin skips text elements whose fonts are missing in Figma. Restore the missing fonts first, then pull the translations again to update those elements.
What if a font does not support the language I am pulling?
Some fonts have no glyphs for scripts such as Arabic, Hebrew, Chinese, Japanese, or Korean. If a text element uses one of them, the translated text may not render and the element looks empty. Switch the element to a font that supports the language and the text appears.
How can I suggest a new feature for the plugin?
We are always glad to hear how the plugin could work better for you. Feel free to contact us.
Previous: Reports and Statistics
Read next: AWS S3 integration
Tired of manually editing translation files?
Our platform streamlines software localization for you.
Documentation
- What is Localizely?
- Getting started
- Localization workflow
- Translation editor
- Organizations
- Flutter Over-the-Air updates
- Flutter In-Context Editing
- Project branching
- Public projects
- Professional translation services
- Machine Translation
- AI Translation
- Translation Memory
- Glossary
- Tasks
- QA checks
- Reports and Statistics
- Figma integration
- AWS S3 integration
- GitHub integration
- GitLab integration
- Bitbucket integration
- CLI
- Configuration file
- Supported file formats
- Universal placeholders
- Language & Country Codes
- Referral Program
- Affiliate Program
- FAQ

Resources
- What is Localizely?
- Getting started
- Localization workflow
- Translation editor
- Organizations
- Flutter Over-the-Air updates
- Flutter In-Context Editing
- Project branching
- Public projects
- Professional translation services
- Machine Translation
- AI Translation
- Translation Memory
- Glossary
- Tasks
- QA checks
- Reports and statistics
- Figma integration
- AWS S3 integration
- GitHub integration
- GitLab integration
- Bitbucket integration
- CLI
- Configuration file
- Supported file formats
- Universal placeholders
- Language & Country Codes
- Referral Program
- Affiliate Program
- I18N Questions
- FAQ
Free tools
- ICU message for translators
- ICU message editor
- Hreflang generator
- Hreflang checker
- JSON Flattener
- JSON Validator
- YAML Validator
- XML Validator
- CSV Validator
- Text Compare
- Text Encoding Converter
- Localization File Converter
- JSON Word Counter
- ARB Word Counter
- Translation Cost Calculator