Contents
How to translate WordPress website into multiple languages
Translating your WordPress website into multiple languages is a great way to reach a broader audience from around the world, improve engagement, and build trust. But how difficult is it to achieve? In this post, you'll discover how to easily translate WordPress using one of the most popular WordPress multilingual plugins. Additionally, you’ll learn about the main benefits and challenges of such translation, along with practical tips that can help you make the translation process easier.
WordPress translation plugins
Plugins are a cornerstone of the WordPress ecosystem. They empower users with flexibility, enable easy customization without the need for coding, and provide modularity by allowing you to add only the features you truly need. When it comes to making a WordPress site multilingual, plugins play an essential role. The WordPress community has developed a range of powerful plugins that simplify website translation and automate many tedious localization tasks. Among the most popular translation plugins are WPML and Polylang. In the following sections, we’ll focus on Polylang, as it is widely used and offers core translation features completely free of charge.
Polylang as a multilingual content manager
Before we start installing and configuring the Polylang plugin, it is worth being aware of a few important details about how Polylang handles translation. Polylang acts as a multilingual content manager, meaning it maps translated pages, posts, and categories behind the scenes and displays the appropriate page variant based on the selected language.
However, this approach is quite different from traditional software localization, where translatable text within the code is replaced at runtime by a localization library with the appropriate translation. Instead of extracting translatable strings into localization files, Polylang works by duplicating content and creating separate versions of pages and posts for each language.
This method is easier for users who are not familiar with coding, since duplicating and translating pages is straightforward and intuitive. However, it comes at the cost of duplicating all content for each language and requiring manual updates on every page, which can sometimes be time-consuming and somewhat annoying.
Setting up Polylang on your WordPress site
In the following sections, you will learn how to install and run WordPress locally on your computer, install the Polylang plugin, configure your theme and permalinks for user-friendly URLs, set up Polylang, translate your content, and much more.
Setting Up WordPress locally with MAMP
Setting up WordPress on your local machine is a straightforward process. At its core, it involves downloading the WordPress package, setting up a local web server and database, and running the WordPress installation script in your web browser. For our local server environment, we'll use MAMP, a free tool that bundles Apache, PHP, and MySQL together for easy local development.
Note: MAMP is just one option for local development. If you prefer XAMPP, WAMP, or another method to run WordPress locally, that's perfectly fine.
Note: Detailed guidelines for installing WordPress can be found in the official WordPress documentation.
Adding a theme
To keep this guide as simple as possible and avoid any confusion later on, we’re going to install a theme for our WordPress website. From the WordPress admin dashboard, go to Appearance > Themes and click on Add Theme. On that page, search for Twenty Twenty-One, then install and activate it.
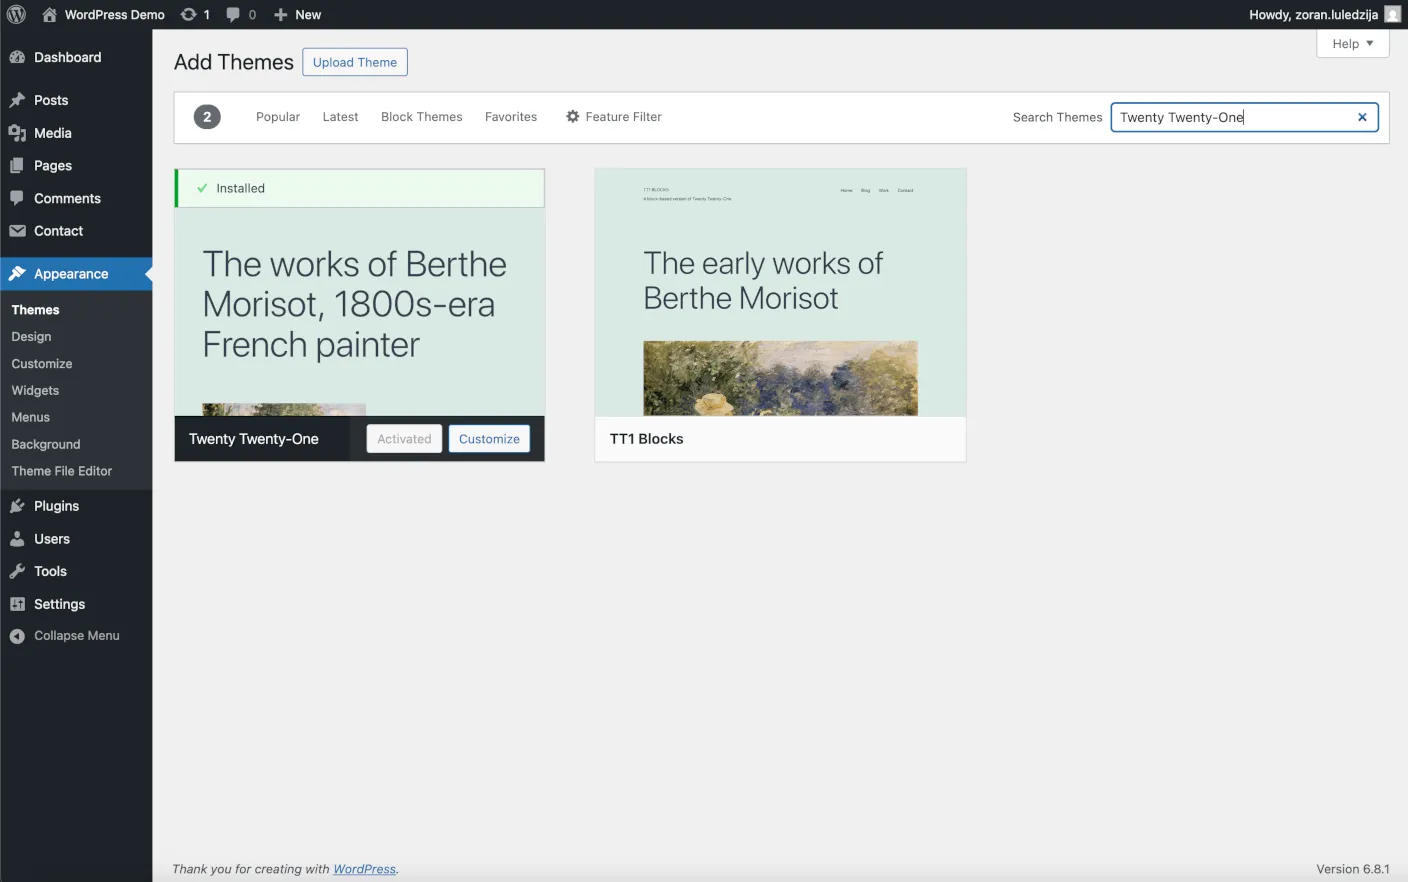
We’re choosing this theme because it works well with the Polylang plugin, which we’ll install later, and it allows us to easily add a language switcher to our website. Additionally, it’s simple and sufficient for the purpose of this guide.
Note: Some themes do not support the easy addition of a language switcher from the Polylang plugin and may require some programming to achieve this.
Configuring permalinks in WordPress
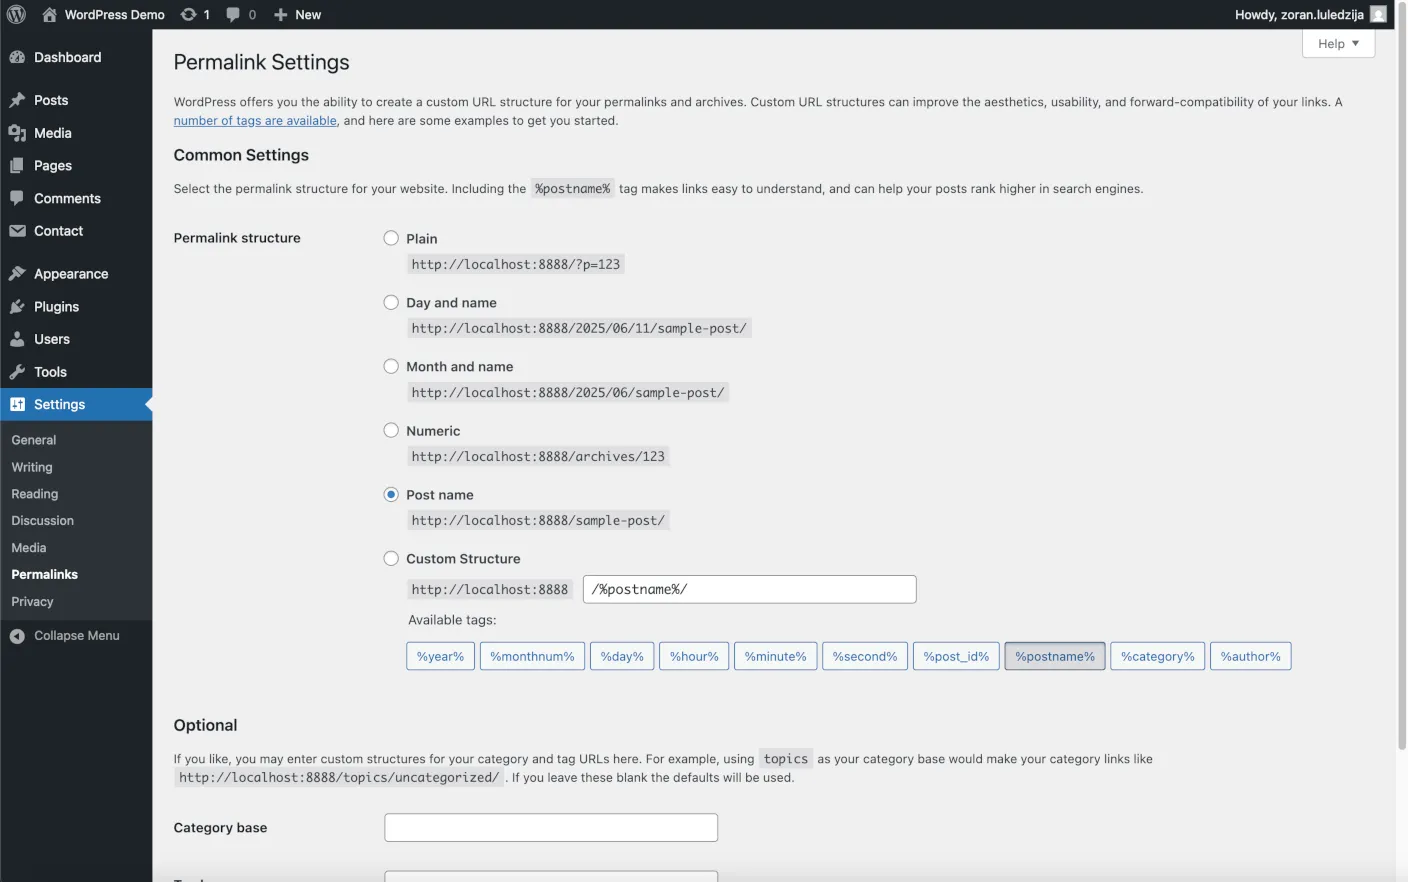
Permalinks in WordPress are the permanent URLs used for pages and posts on your website. By default, WordPress uses a custom permalink structure that is neither very intuitive nor easy to remember. To make your URL structure more user-friendly and straightforward, let’s update it to use just the post name. This configuration will also align with the URL modifications from the Polylang plugin, which we will configure later, allowing for intuitive URL paths for pages in multiple languages.
Note: This step is optional but will make your WordPress URLs clearer and more user-friendly.
To change the default permalink behavior, navigate to the admin dashboard, go to Settings > Permalinks, set the Permalink structure to Post name, and save the changes.
Changing the permalinks configuration to Post name will also require updating the Apache configuration in MAMP. So, let's ensure that the mod_rewrite module is enabled in the httpd.conf file (i.e., the corresponding line is not commented out with a #). On macOS, this file is most likely located in the /Applications/MAMP/conf/apache/ directory.
The httpd.conf file:
...
LoadModule rewrite_module modules/mod_rewrite.so
...
Installing the Polylang plugin
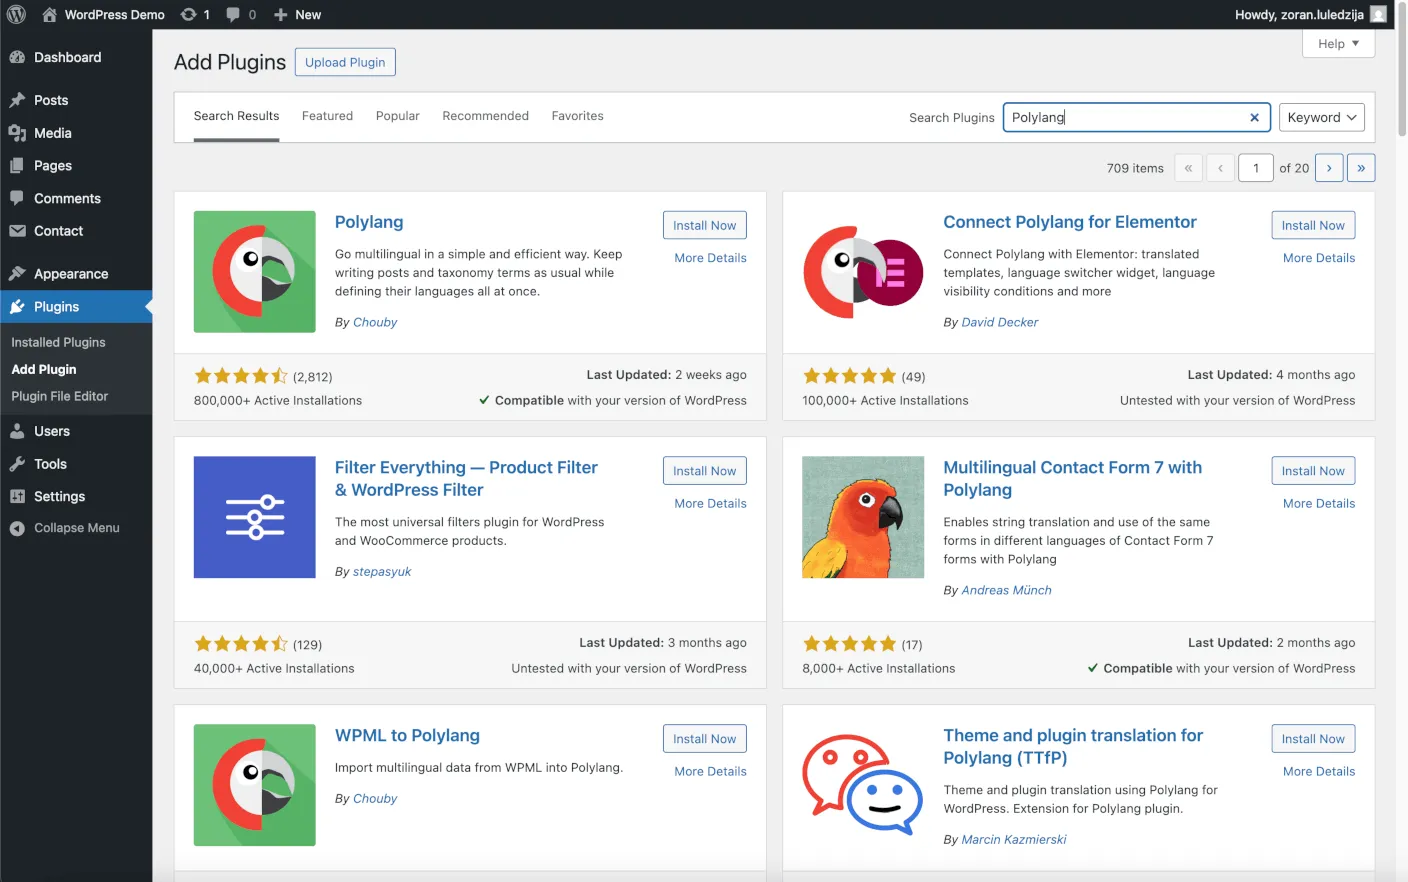
Installing the Polylang plugin is similar to installing any other WordPress plugin. From the WordPress admin dashboard, go to Plugins > Add Plugin and search for "Polylang". Once you find the Polylang plugin in the search results, click Install Now and then Activate to enable it on your site.
Once you have activated the Polylang plugin on your WordPress website, you should notice a new Languages menu item in the left sidebar of the admin dashboard.
Adding initial pages
Before we begin configuring the Polylang plugin and translating content, let's first add a few pages to our WordPress website. Below is the structure of the pages we will be adding:
Home
Contact
Blog
  ∟ Welcome Post
We will create three pages, Home, Contact, and Blog, and one post, titled "Welcome Post".
Once these pages and the post have been added, let's update the WordPress settings to designate the homepage and posts page. To do this, navigate to Settings > Reading. Under Reading Settings, set the Homepage and Posts page accordingly, then save your changes.
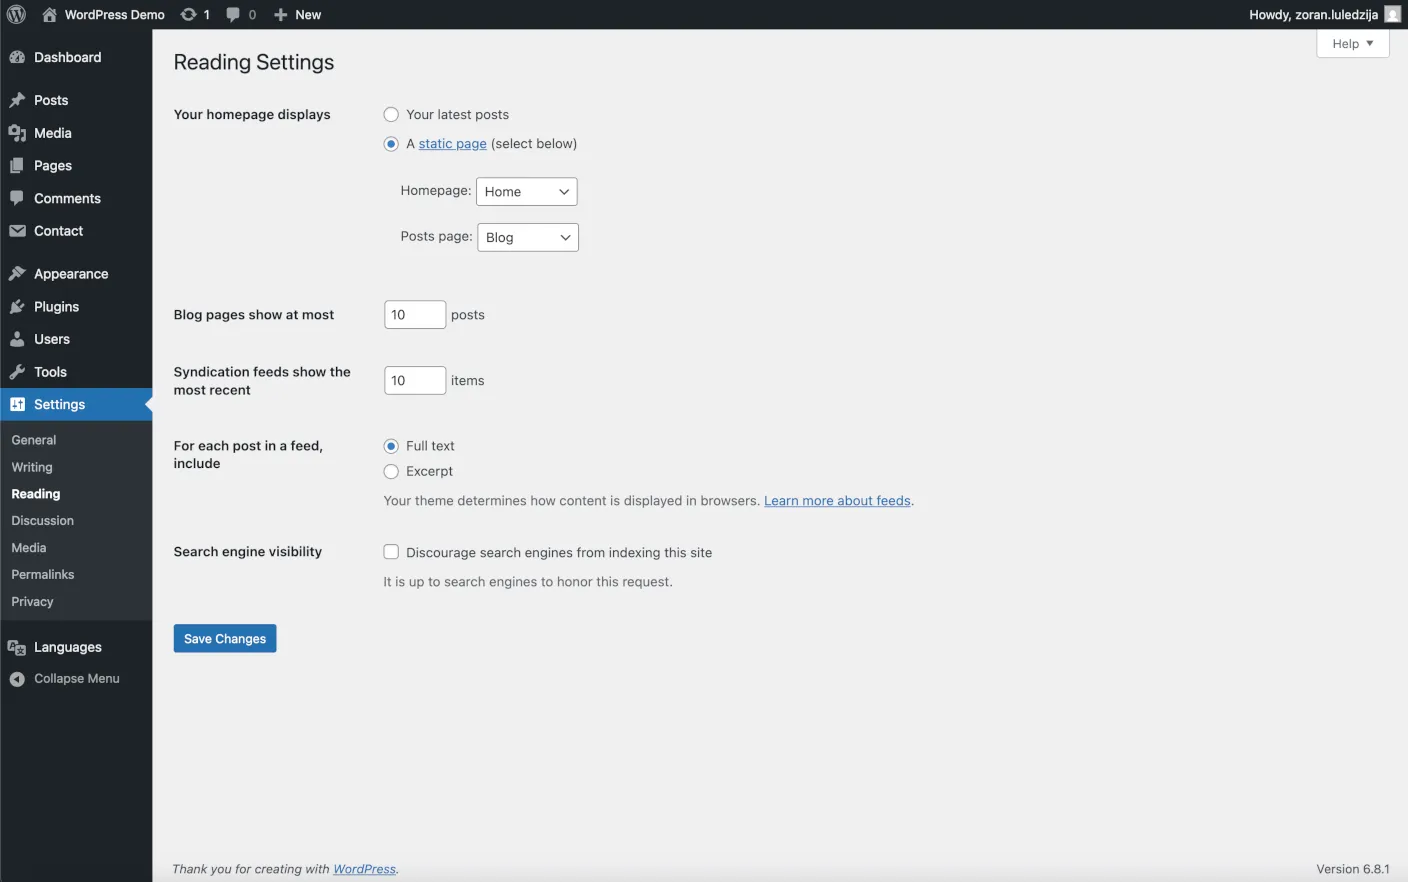
This configuration will set the homepage to our Home page and set the Blog page to display our posts, or in our case, the post titled "Welcome Post".
To keep this already lengthy post simple, we will omit entering data on these pages for now. However, feel free to add some text if you’d like, as we will be translating all of these pages in one of the following steps.
Configuring Polylang
Finally, we can configure the Polylang plugin and add the initial languages to our WordPress site. As mentioned earlier, after activation, the Polylang plugin adds a Languages menu item to the left sidebar of the admin dashboard. Now it's time to use it.
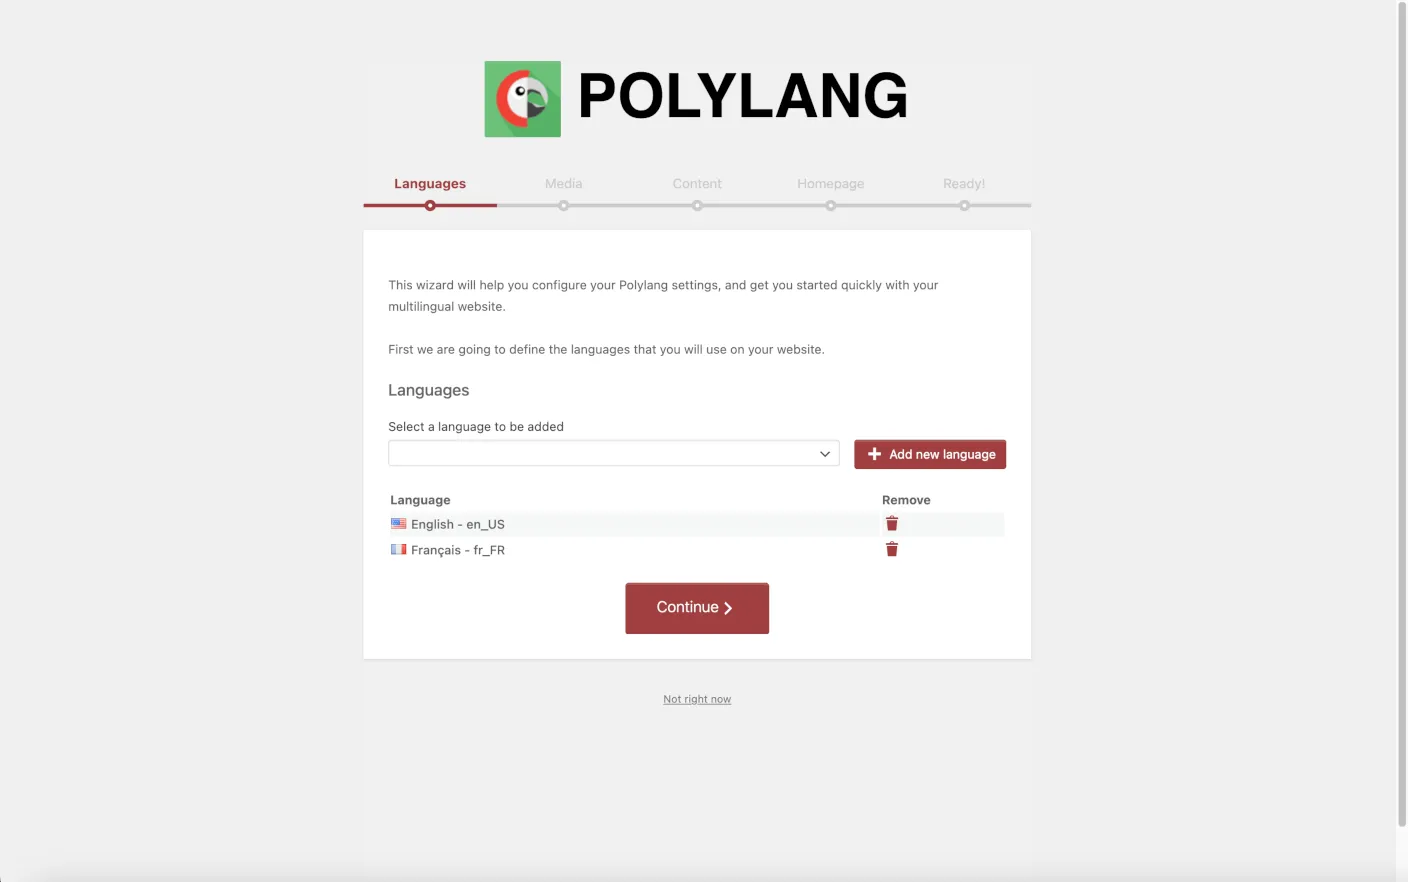
By going to Languages > Setup, Polylang will display a guide where you can easily enter the basic configuration settings. Here, you can add the languages you plan to use on your WordPress website and configure some initial settings.
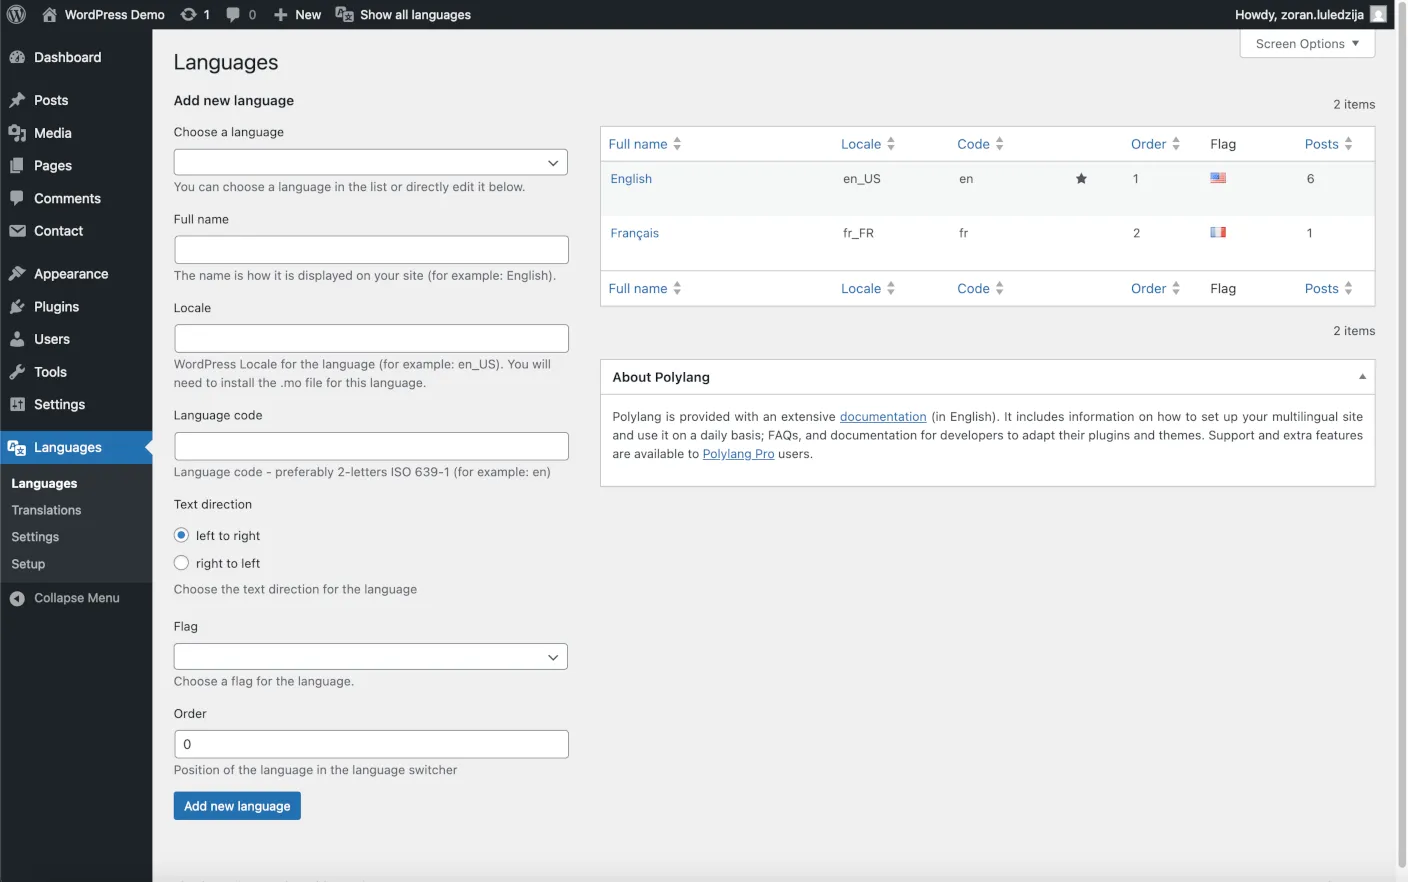
Once you've completed the Polylang setup, you can return to the admin dashboard and notice that Polylang has added those languages, updated the Languages > Settings section, and created a new menu item, the Languages > Translations.
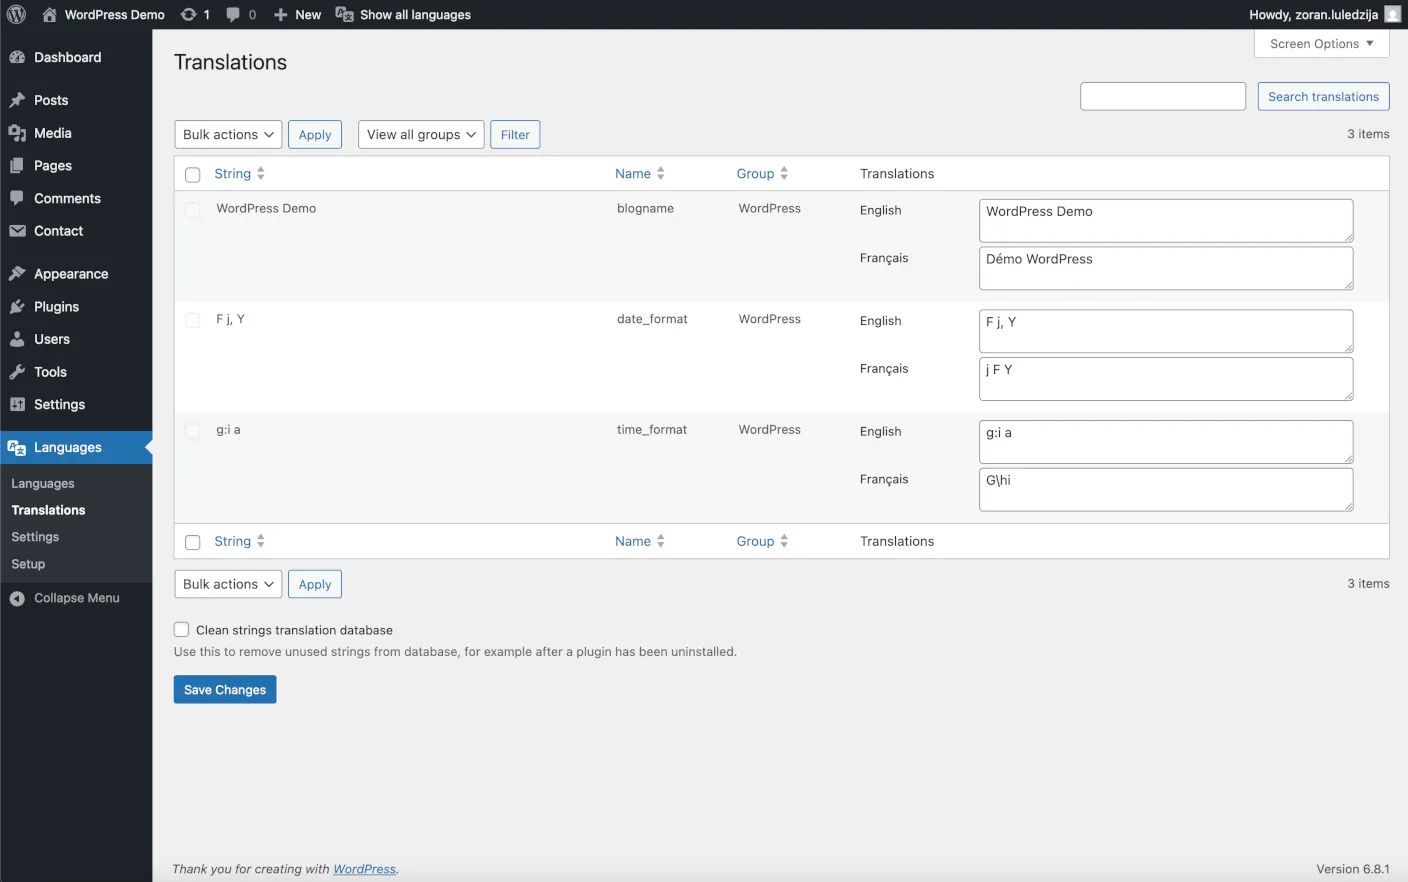
On the Languages > Translations page, we can see some texts such as the app title and formatting options for the languages we've added. Let’s populate them with appropriate values.
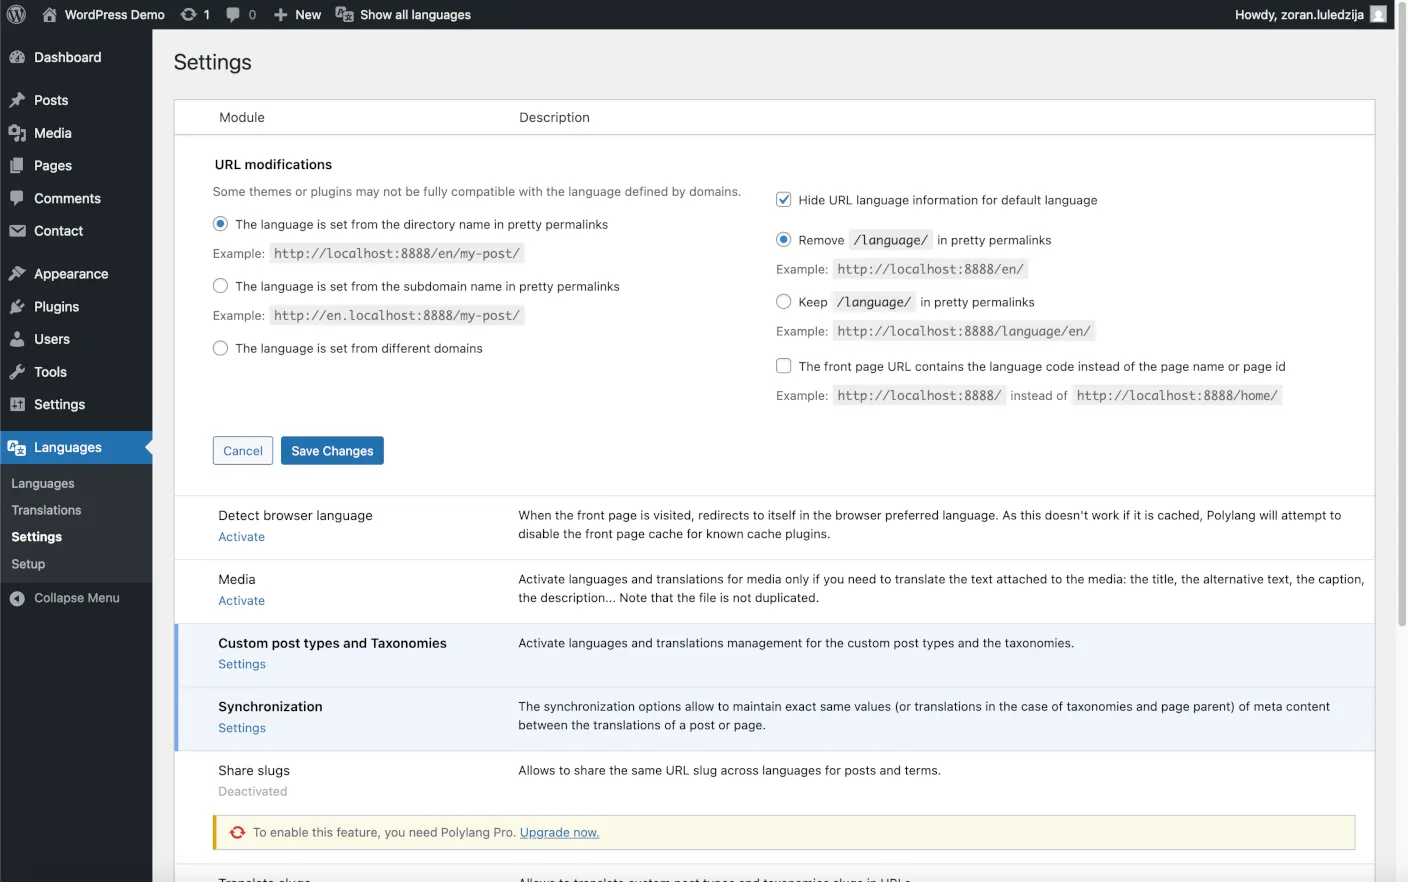
On the Languages > Settings page, we can review the Polylang configuration and update any settings if needed.
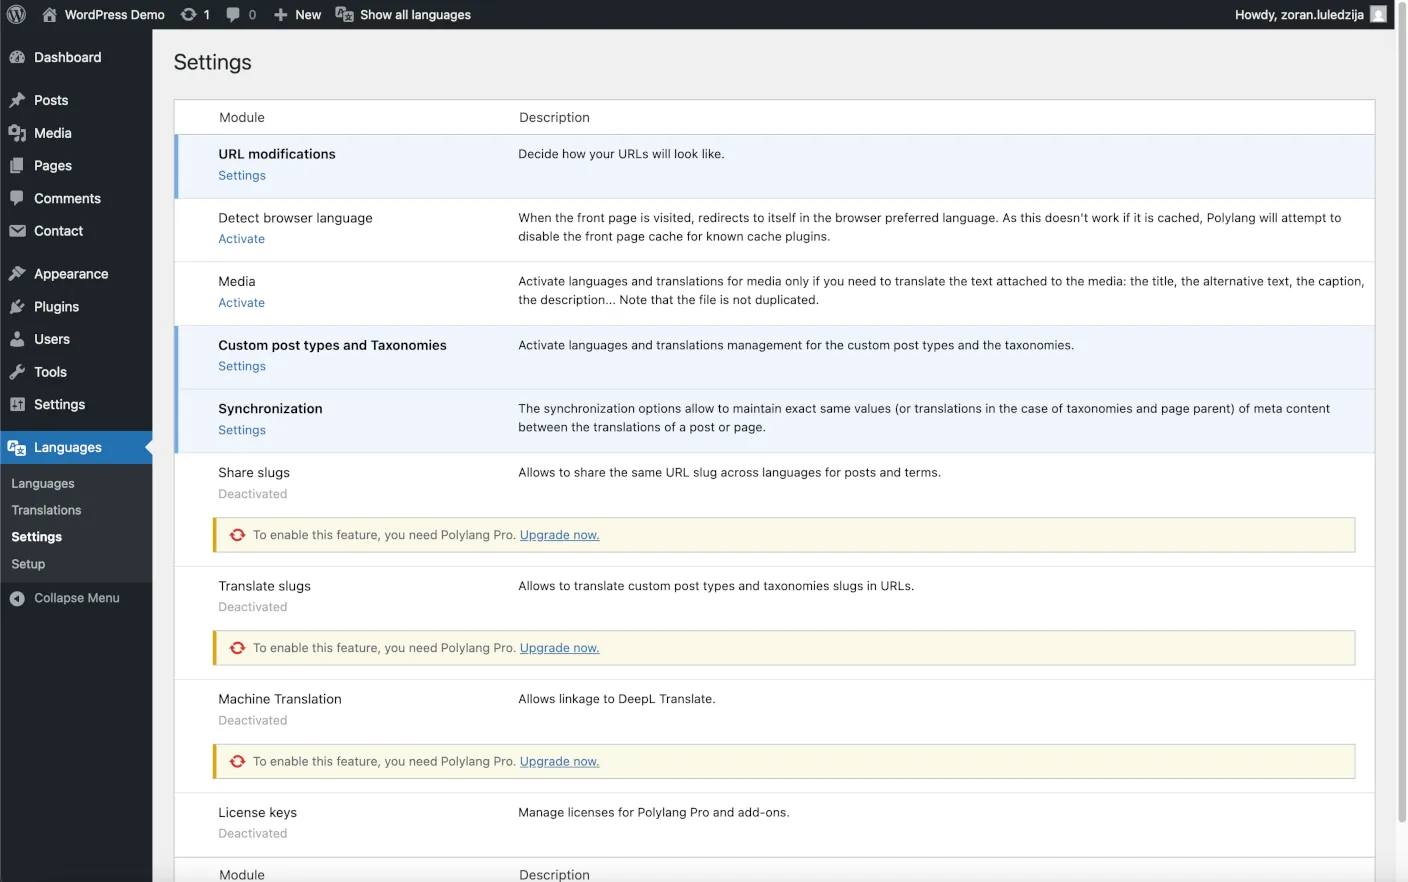
For now, the most important section is URL modifications. Below, you can see how this section looks.
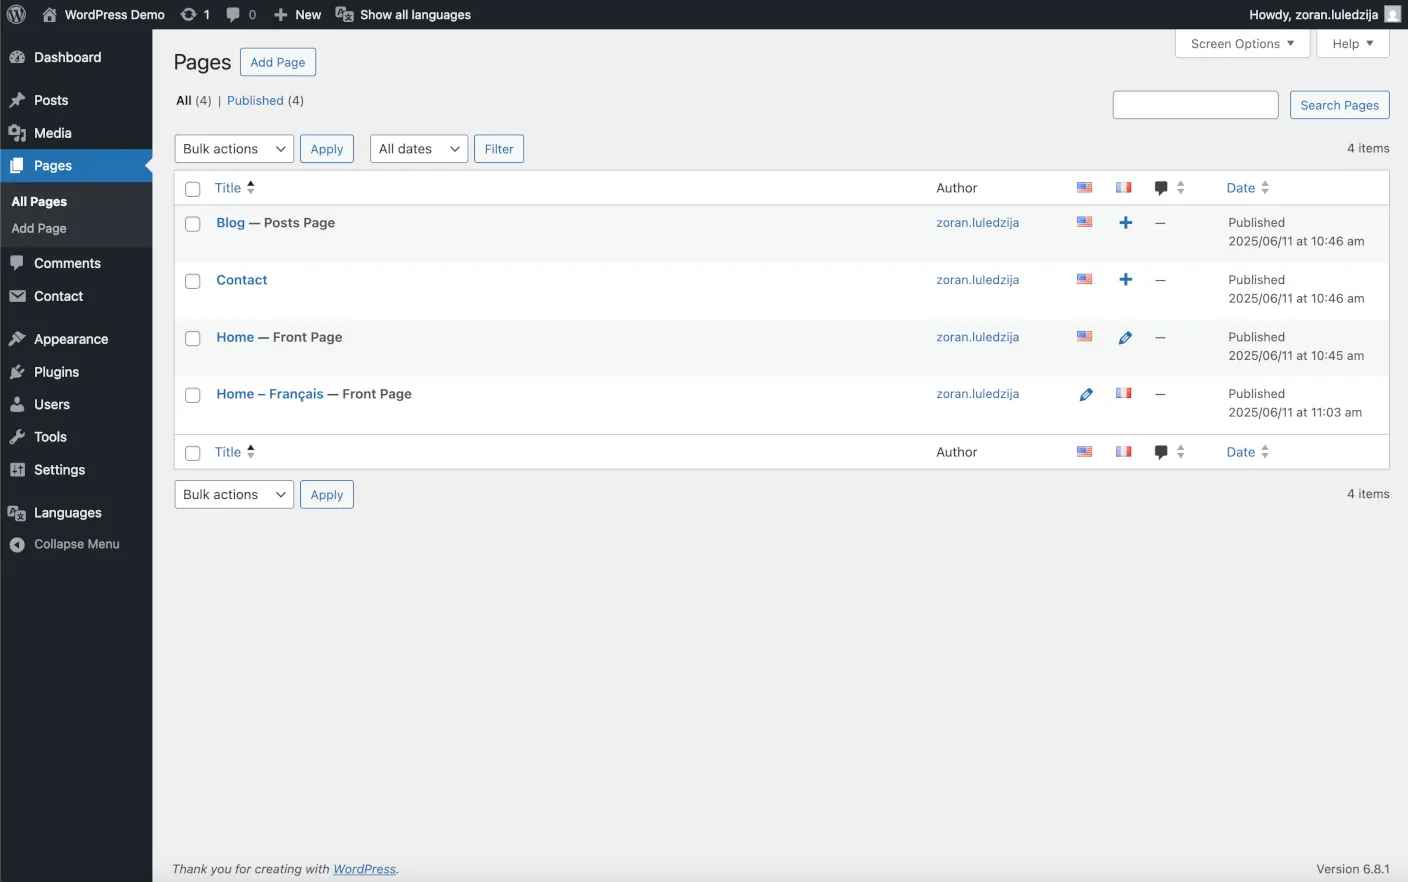
Translating content
Now that we’ve prepared everything and configured Polylang, let’s translate our pages and posts. This process should be straightforward. Next to each page and post, you’ll see the languages your WordPress site supports, along with buttons to edit existing translations or add missing ones.
Note: The free version of the Polylang plugin does not allow you to use the same URL slugs for posts or terms across different languages. According to the Polylang documentation, this feature is only available in the paid version of the plugin.
Adding language switcher
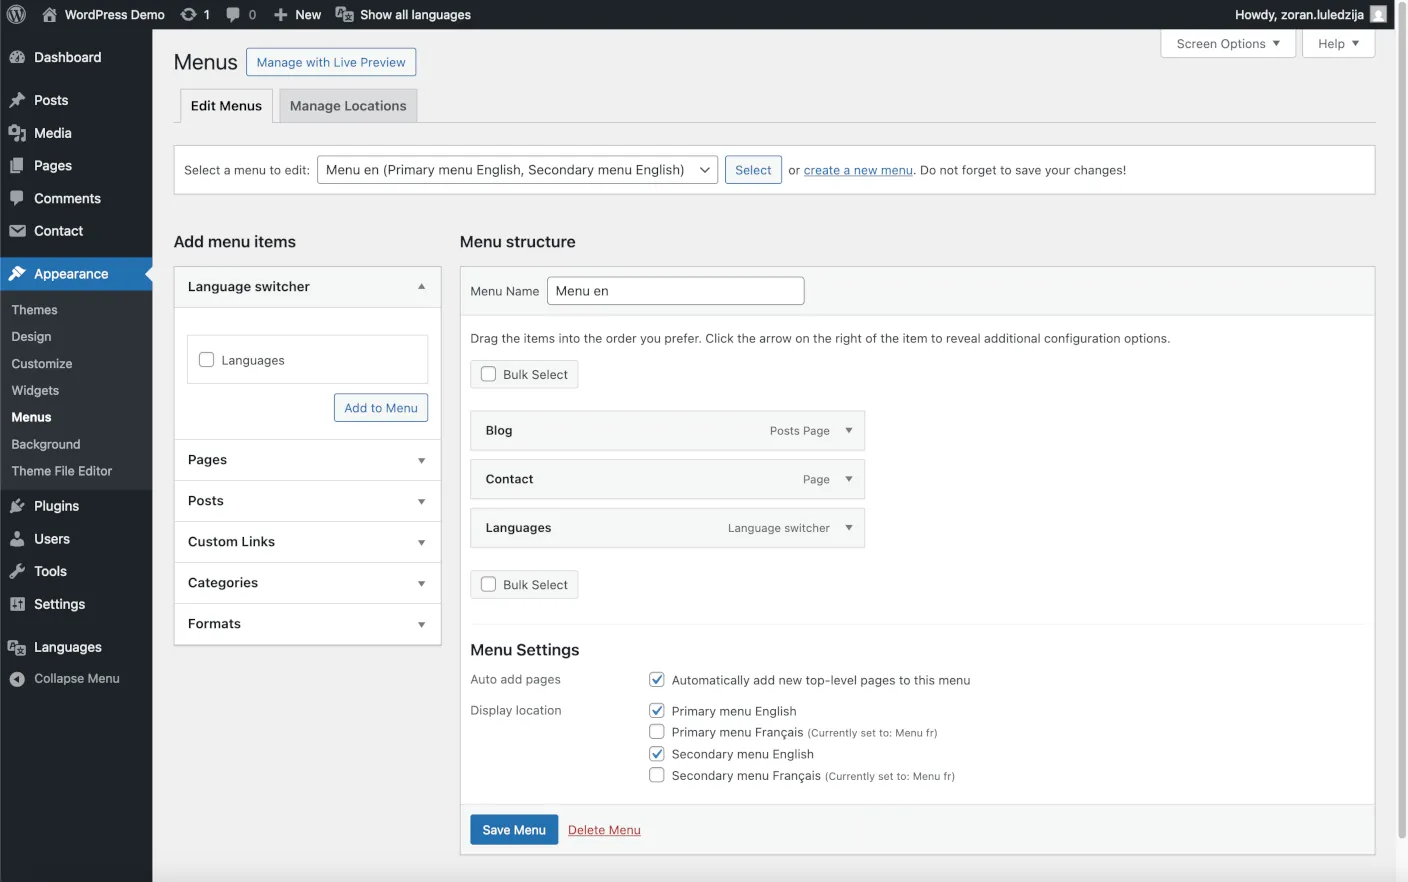
Since we have added pages and posts and translated all content, we want to add a language switcher so our users can easily change the language on our WordPress website. For this reason, we initially installed the Twenty Twenty-One theme, as it allows us to add a language switcher easily.
To set this up, navigate to Appearance > Menus in the admin dashboard and create a menu for each language, one for English and one for French, in our case. Here, we will also add the Language Switcher provided by Polylang. Below, you can see an example of the menu for the English language.
Note: If you can't see the Language Switcher on the Menus page, check if "Language switcher" is checked under the Screen Options in the top right corner.
Note: If you don't see the menu on your pages, make sure it is configured correctly and that your pages include it.
That’s it! You should now have a fully functional multilingual WordPress site.
Detecting browser language
In software localization, it is common practice to detect the user's preferred language and display the page accordingly in the most appropriate language. The Polylang plugin also supports this feature. Under Languages > Settings, you can enable the Detect browser language option if you require this functionality.
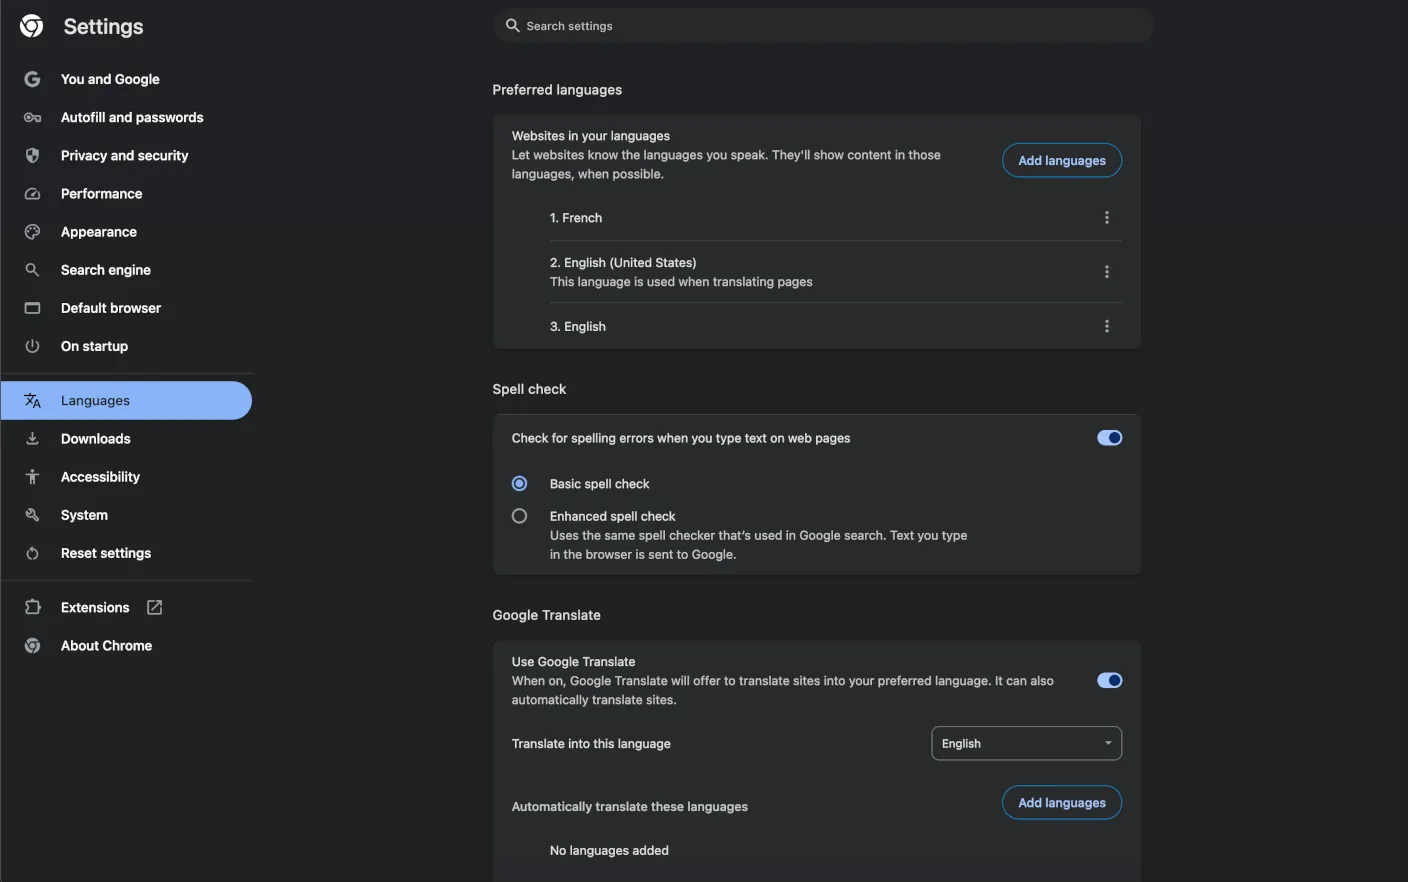
This detection works by examining the Accept-Language header in the request and, if necessary, redirecting the user to a page in a more suitable language. You can test this behavior by changing your browser’s language to French and then visiting your multilingual WordPress website.
Note: This detection should work only for users who are visiting your WordPress site for the first time. If the detection does not work as intended, try deleting the pll_language cookie and test again.
Translate WordPress effectively
When translating WordPress sites, it’s important to keep the following points in mind:
- Ensure that links between pages work as expected on your multilingual WordPress site.
- Make sure you have also translated all meta data.
- Add hreflang tags so that search engines better understand your pages and the relationships between them. Check hreflang generator and checker tools.
- Remember that some images may contain text, which also needs to be translated.
- Users appreciate being able to change the language; ensure that at least one language switcher is available on your website.
- When using the Polylang plugin, duplicating pages and re-entering all the content can be tedious. A faster workflow is to open your pages in WordPress using the Code Editor instead of the Visual Editor, copy the content, paste it into the new page, and then translate it.
- If you already use other plugins, check if Polylang is compatible with them. For example, elements of Contact Form 7 can also be translated using Polylang by installing the Contact Form 7 Polylang Module and the Smart Grid-Layout Design for Contact Form 7.
- Some languages require more space. Make sure that buttons or text are displaying and wrapping properly, especially on smaller screens.
- Keep in mind that date and number formatting may differ between languages.
Conclusion
In this post, we shared how to translate WordPress site into multiple languages using the Polylang plugin. We also included useful tips to help you save time and streamline the translation process.
But what if you need to translate a WordPress theme or plugin and work with localization files? How can you seamlessly collaborate with your translators and the rest of your team? That’s where the Localizely platform comes in. With Localizely, you can quickly upload your PO localization files, translate them efficiently, and integrate them back into your codebase with ease. The platform offers a host of valuable features, including machine translation, translation memory, glossaries, intuitive team collaboration tools, and much more.
Like this article? Share it!
Zoran is a Software Engineer at Localizely. His primary interest is web development, but he also has a solid background in other technologies. For the last few years, he has been involved in the development of software localization tools.
Enjoying the read?
Subscribe to the Localizely blog newsletter for quality product content in your inbox.

Resources
- What is Localizely?
- Getting started
- Localization workflow
- Translation editor
- Flutter Over-the-Air updates
- Flutter In-Context Editing
- Project branching
- Professional translation services
- Machine Translation
- AI Translation
- Translation Memory
- Glossary
- Tasks
- Reports and statistics
- Figma integration
- AWS S3 integration
- GitHub integration
- GitLab integration
- Bitbucket integration
- CLI
- Configuration file
- Supported file formats
- Language & Country Codes
- Referral Program
- Affiliate Program
- I18N Questions
- FAQ
Free tools
- ICU message for translators
- ICU message editor
- Hreflang generator
- Hreflang checker
- JSON Flattener
- JSON Validator
- YAML Validator
- XML Validator
- CSV Validator
- Text Compare
- Text Encoding Converter
- Localization File Converter
- JSON Word Counter
- ARB Word Counter
- Translation Cost Calculator