
GitLab Integration
New strings flow in from your repository, finished translations flow back as a merge request.
Documentation
- What is Localizely?
- Getting started
- Localization workflow
- Translation editor
- Organizations
- Flutter Over-the-Air updates
- Flutter In-Context Editing
- Project branching
- Public projects
- Professional translation services
- Machine Translation
- AI Translation
- Translation Memory
- Glossary
- Tasks
- QA checks
- Reports and Statistics
- Figma integration
- AWS S3 integration
- GitHub integration
- GitLab integration
- Bitbucket integration
- CLI
- Configuration file
- Supported file formats
- Language & Country Codes
- Referral Program
- Affiliate Program
- FAQ
The GitLab integration keeps localization files in sync between a GitLab repository and your Localizely project, so developers and translators can each work in the tool they know without passing files around by hand.
It works in both directions. Localizely pulls localization files from the repository, either on demand or automatically through a webhook whenever your team pushes code. When translations are ready, Localizely pushes them back by opening a merge request in your repository, so the updated files go through your normal review before they are merged.
Setup
1. Add a localizely.yml file to your repository
The integration reads a localizely.yml configuration file from your repository to learn which files to pull from GitLab and which files to push back. Here is a minimal configuration for a Flutter project:
config_version: 1.0 # Only 1.0 available
project_id: 33d9e1a5-6ba8-4b36-a354-47389c432f42 # Your project ID from: https://app.localizely.com/projects
file_type: flutter_arb
upload:
  files: # List of files for upload to Localizely. Usually it is just one file used for the main locale
    - file: lib/l10n/intl_en.arb
      locale_code: en
download:
  files: # List of files for download from Localizely.
    - file: lib/l10n/intl_en.arb
      locale_code: en
    - file: lib/l10n/intl_de.arb
      locale_code: de
    - file: lib/l10n/intl_es.arb
      locale_code: es
The configuration file page covers every available option, including other file formats.
2. Create a GitLab access token
Localizely authenticates with GitLab using a personal access token. On GitLab, click your avatar in the top-right corner and go to Preferences > Access Tokens. Give the token a name, select the api scope, and click Create personal access token.
If you would rather not tie the integration to a personal account, a project access token with the same api scope works just as well, provided your GitLab plan supports them.
Copy the token as soon as it is created. GitLab shows it only once.
3. Connect your repository
In Localizely, the project owner and project admins connect the repository. Open the project's Settings page and select GitLab Integration in the Integrations section, then:
- Choose GitLab.com or Self-managed GitLab, depending on where your repository is hosted.
- Paste the access token you just created.
- Select the repository to sync with Localizely.
- Select the branch to pull from and push to. For most teams this is
main. - Confirm the path to your
localizely.ymlfile. Localizely detects it automatically when it is in the repository root. - Click Validate config. Localizely checks that the token works and that the configuration file is valid, and tells you if anything needs fixing.
- Click Save.
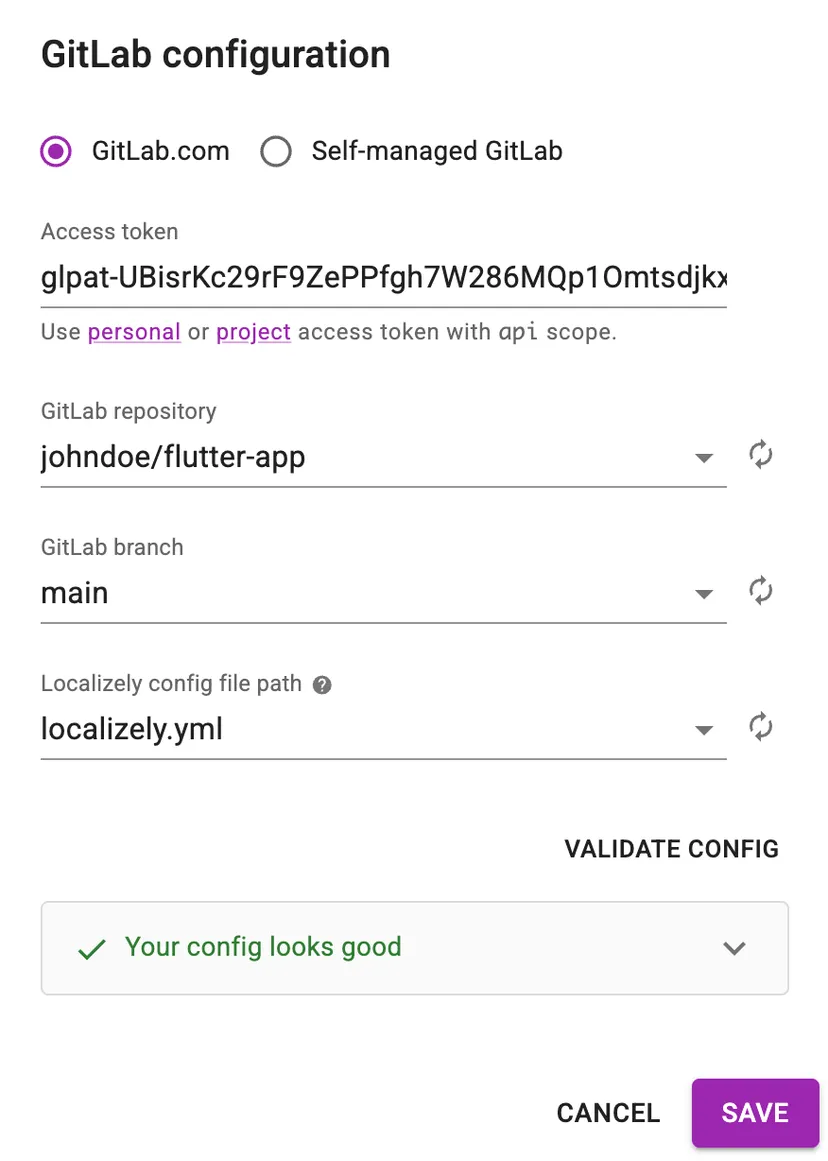
Your access token is stored encrypted and is never shown in full again after you save it.
Pulling files from GitLab
Manual pull
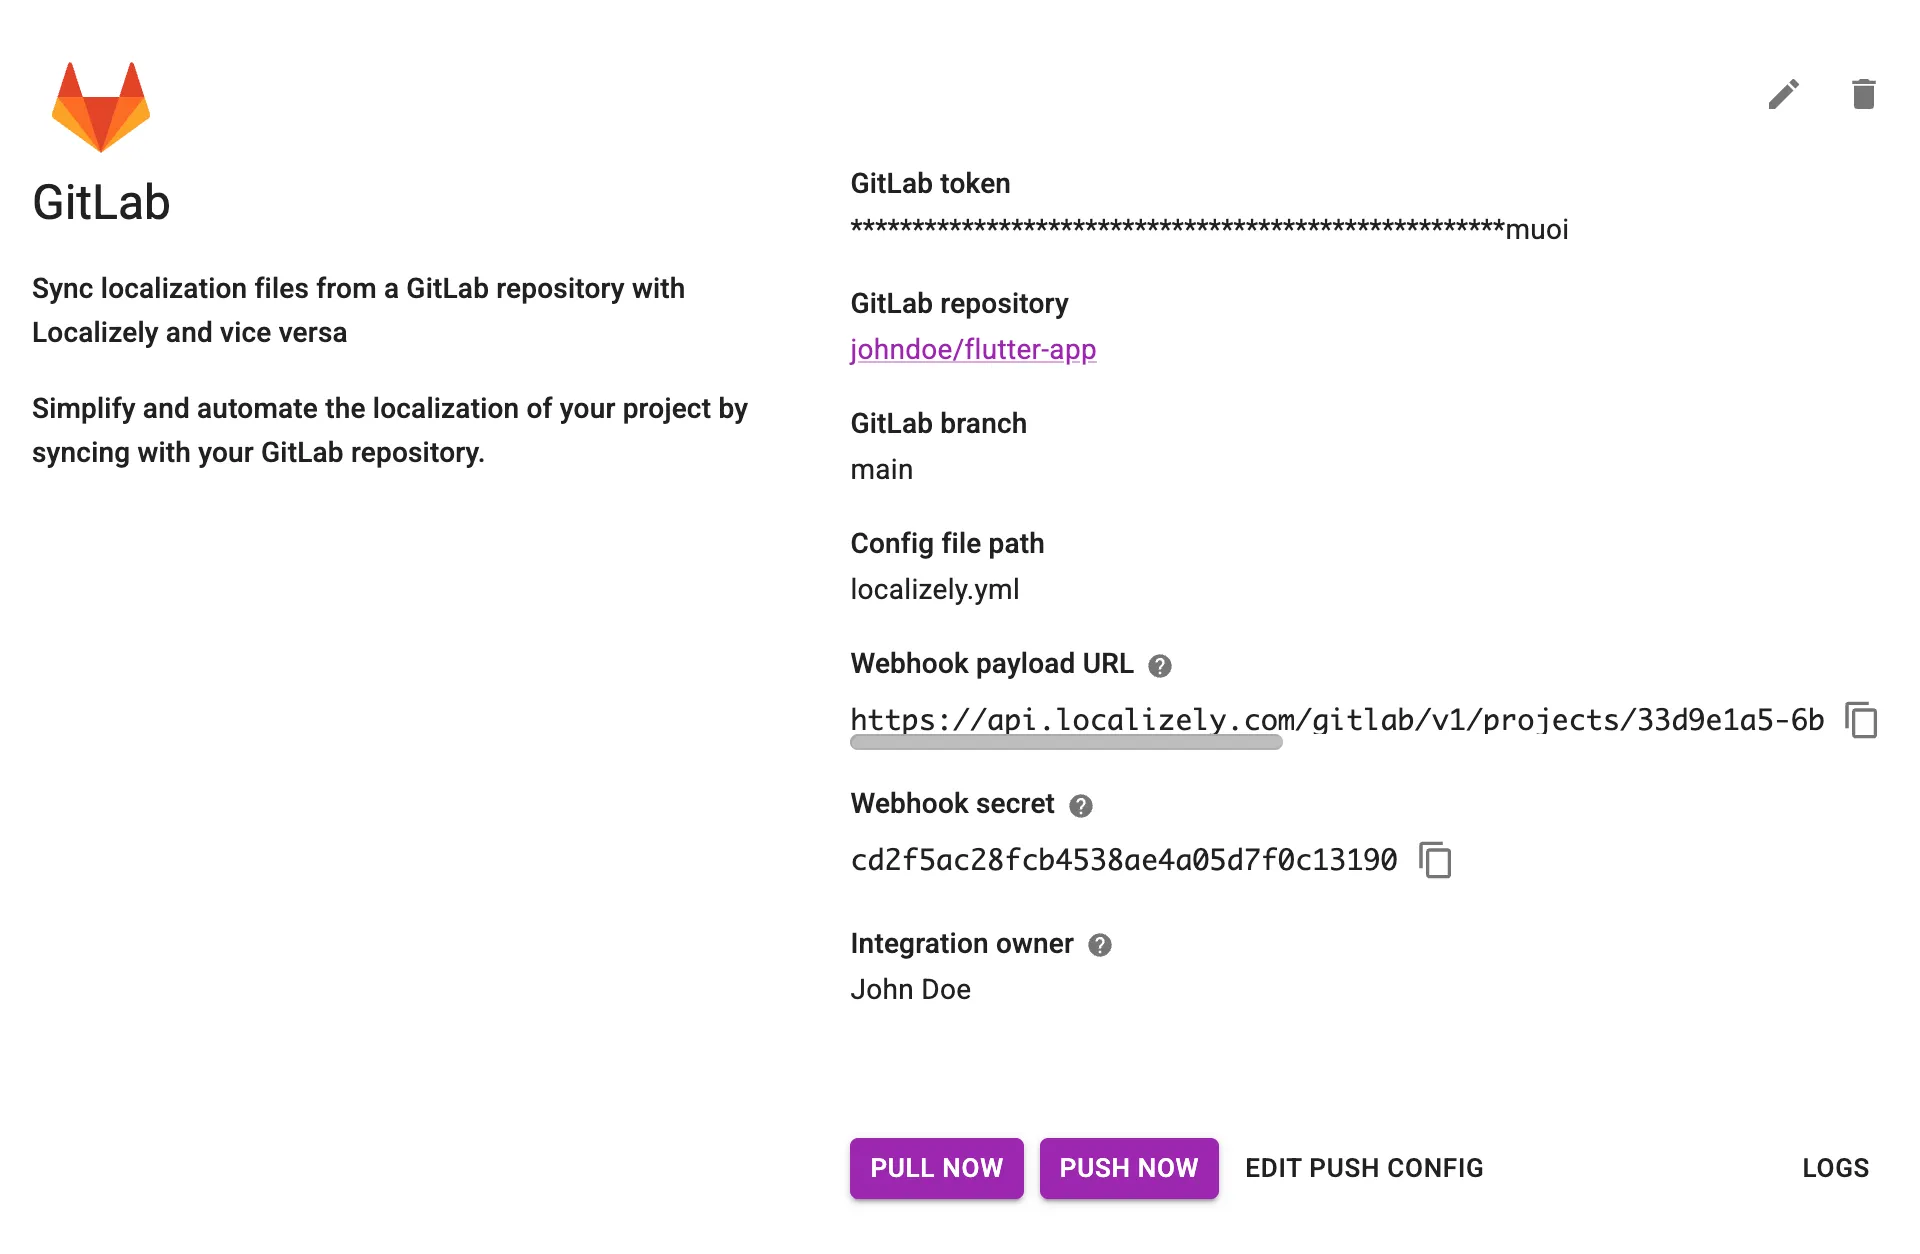
On the project's Settings page, open Integrations > GitLab and click Pull now. Localizely reads the files listed in the upload section of your configuration and imports any new or changed strings.
Automatic pull
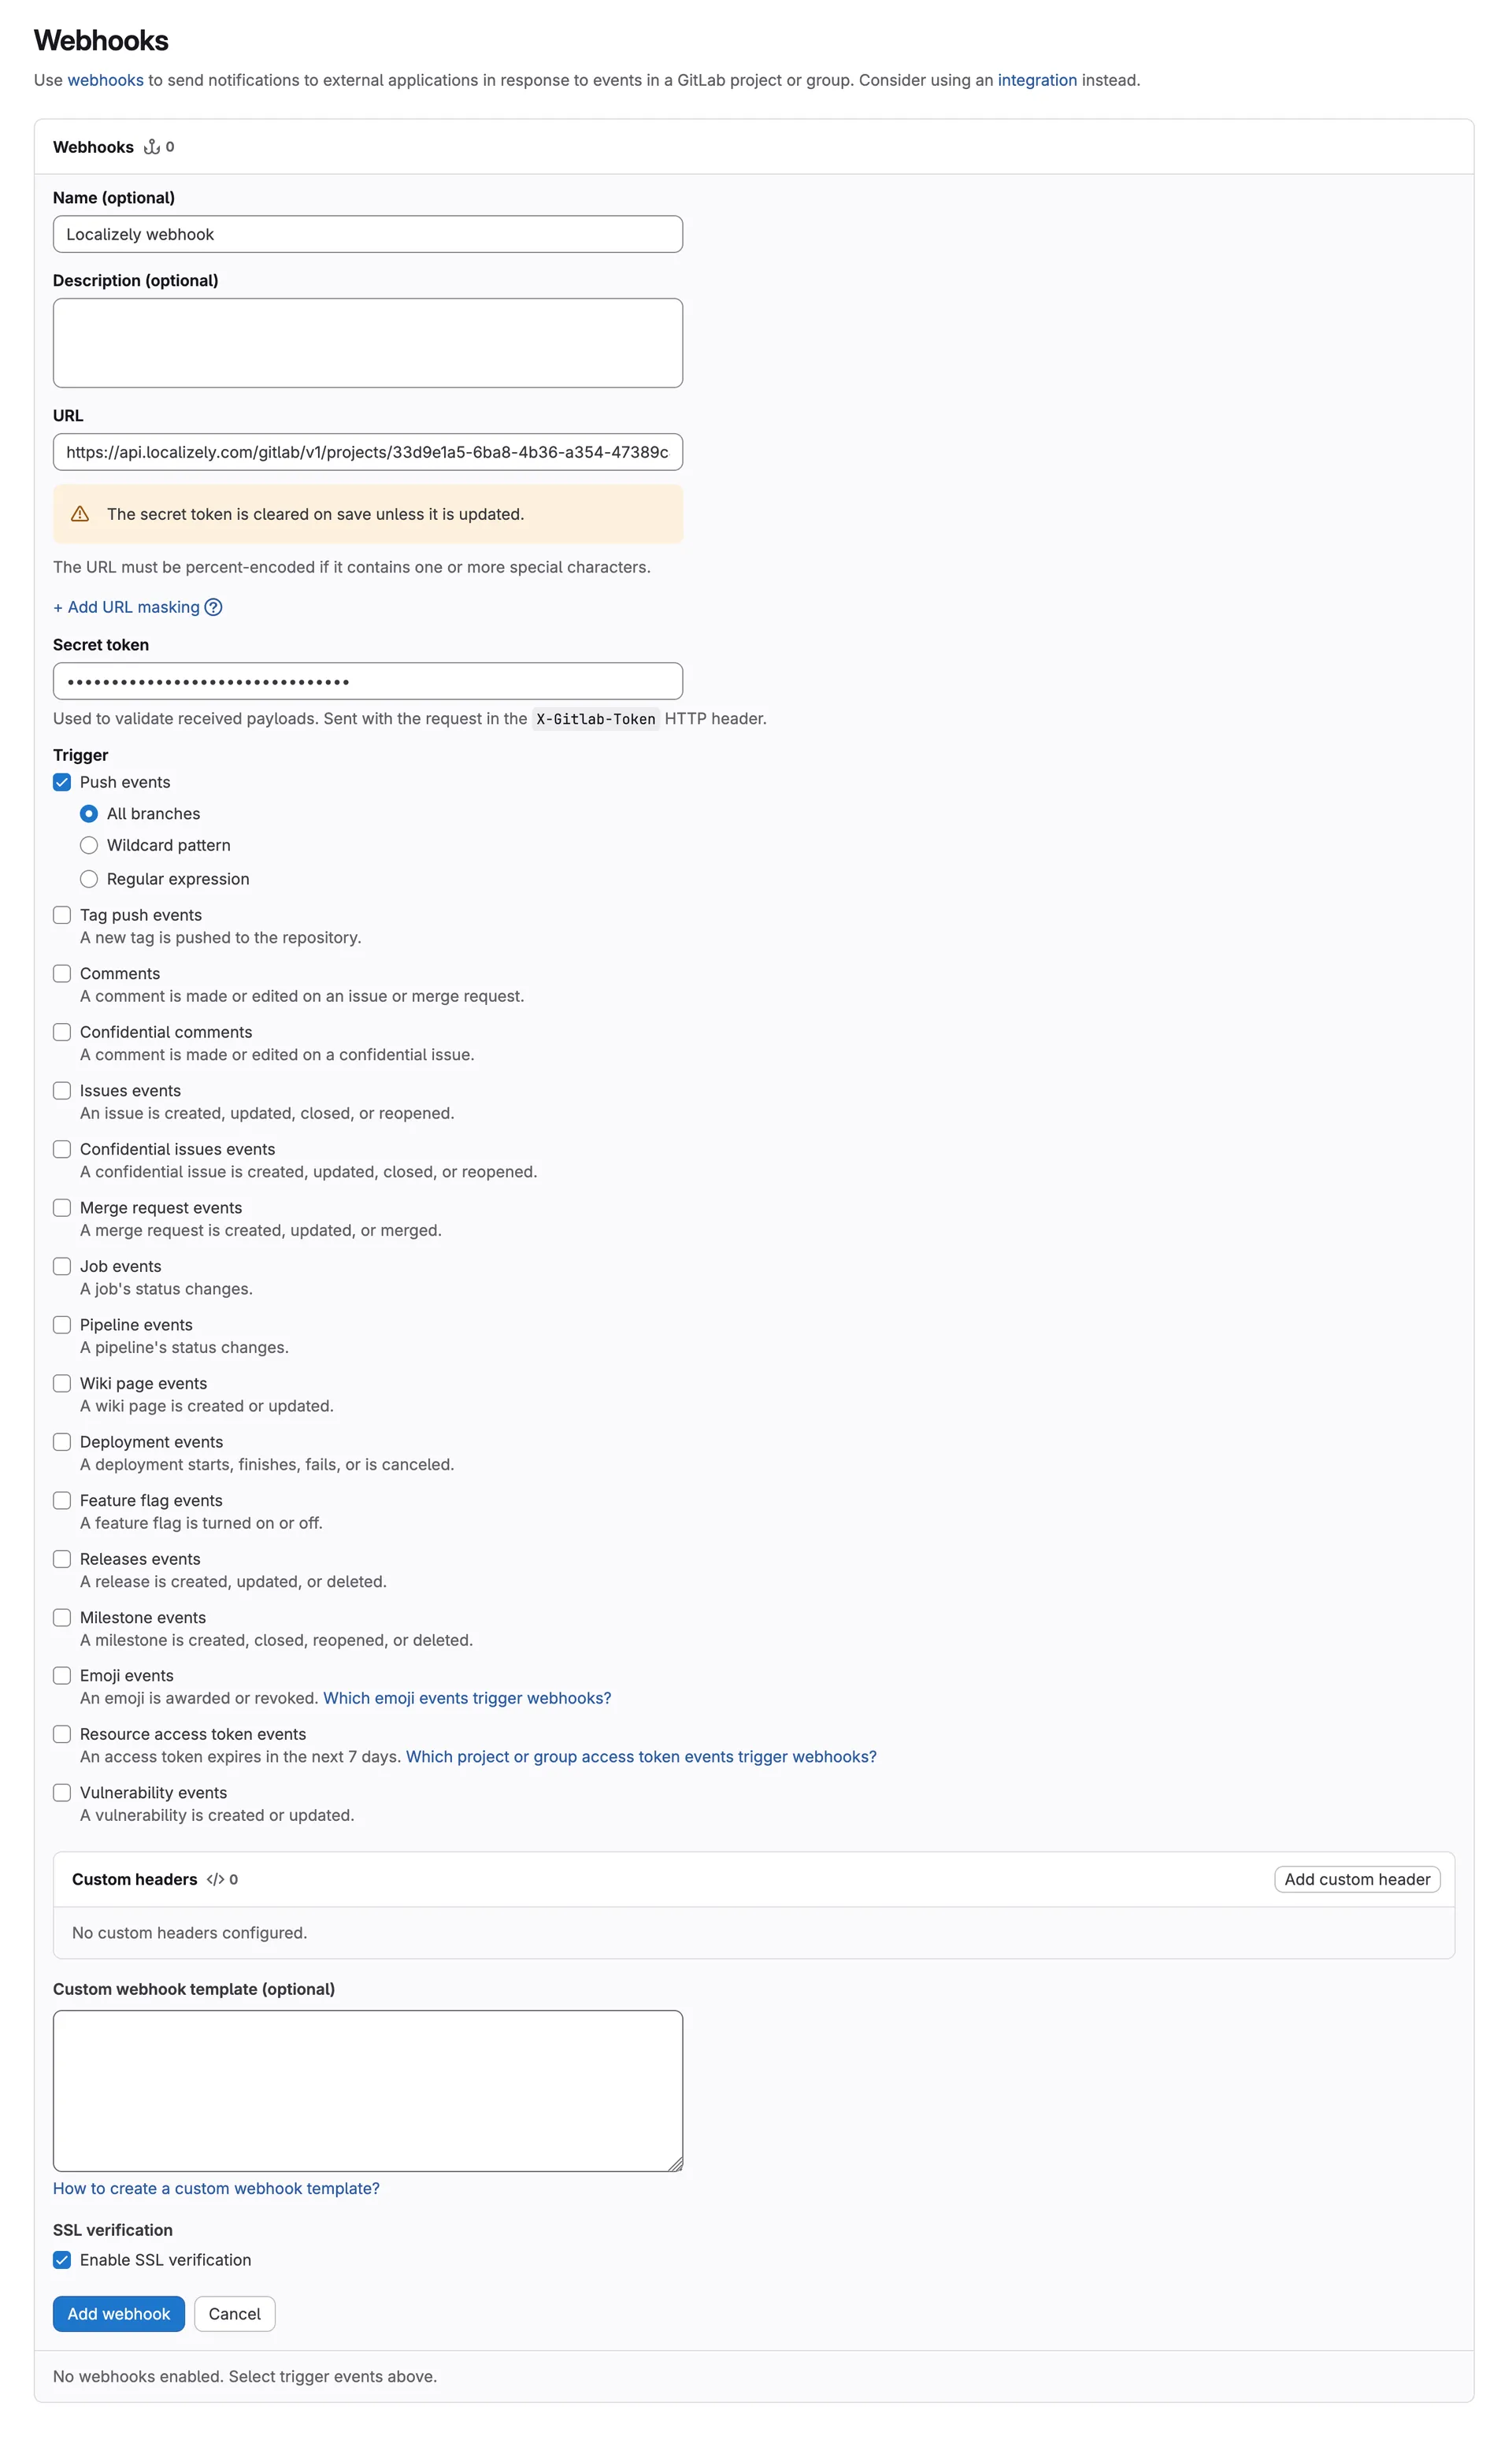
Once a manual pull works, set up a webhook so Localizely pulls automatically every time code is pushed to the connected branch. New strings reach your translators minutes after a developer commits them, with no one having to remember to sync.
In GitLab, open your repository's Settings > Webhooks and click Add new webhook. Copy the Webhook payload URL and Webhook secret from the integration details in Localizely into the URL and Secret token fields. Under Trigger, keep Push events selected, and save the webhook.
Pushing files to GitLab
When the translations are ready, open Integrations > GitLab on the project's Settings page and click Push now. Localizely then:
- Creates a new branch from the latest revision of the connected branch, named like
localizely_2025-07-08_13-15-10. - Commits the updated localization files to that branch.
- Opens a merge request from the new branch into the connected branch.
Your team reviews and merges the merge request on GitLab like any other change. Localizely never commits directly to the connected branch.
Frequently asked questions
Can I link one Localizely project to several repositories?
This integration connects a Localizely project to a single GitLab repository. To keep additional repositories in sync with the same project, use the CLI or the REST API.
Previous: GitHub integration
Read next: Bitbucket integration
Tired of manually editing translation files?
Our platform streamlines software localization for you.
Documentation
- What is Localizely?
- Getting started
- Localization workflow
- Translation editor
- Organizations
- Flutter Over-the-Air updates
- Flutter In-Context Editing
- Project branching
- Public projects
- Professional translation services
- Machine Translation
- AI Translation
- Translation Memory
- Glossary
- Tasks
- QA checks
- Reports and Statistics
- Figma integration
- AWS S3 integration
- GitHub integration
- GitLab integration
- Bitbucket integration
- CLI
- Configuration file
- Supported file formats
- Language & Country Codes
- Referral Program
- Affiliate Program
- FAQ

Resources
- What is Localizely?
- Getting started
- Localization workflow
- Translation editor
- Organizations
- Flutter Over-the-Air updates
- Flutter In-Context Editing
- Project branching
- Public projects
- Professional translation services
- Machine Translation
- AI Translation
- Translation Memory
- Glossary
- Tasks
- QA checks
- Reports and statistics
- Figma integration
- AWS S3 integration
- GitHub integration
- GitLab integration
- Bitbucket integration
- CLI
- Configuration file
- Supported file formats
- Language & Country Codes
- Referral Program
- Affiliate Program
- I18N Questions
- FAQ
Free tools
- ICU message for translators
- ICU message editor
- Hreflang generator
- Hreflang checker
- JSON Flattener
- JSON Validator
- YAML Validator
- XML Validator
- CSV Validator
- Text Compare
- Text Encoding Converter
- Localization File Converter
- JSON Word Counter
- ARB Word Counter
- Translation Cost Calculator